In this tutorial, let us create a login script with a session in PHP. It has a simple example of implementing user authentication. This example uses a standard login form to get the user login details. And it preserves the login state with PHP sessions.
Login would be the first step of many applications. Sometimes, part of the privileged functionalities of the application will ask users to log in.
So, the login script is an integral part of an application. I will present to you the implementation of the login system with minimal code.
Authentication will help us to identify genuine users. By enabling authentication, we can protect our website from anonymous access.
What is inside?
- Ways to create an authentication system
- About this example
- File structure
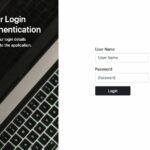
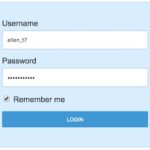
- User login interface
- PHP code to process login
- Get logged-in user profile data to show a welcome message
- Handling logout code in PHP
- Database script
- Test login details
- PHP login script with session output
Ways to create an authentication system
There are different ways of implementing an authentication system. The most popular way is to get the username and password via a login form and authenticate based on them.
Recently, authentication using OTP is also becoming the norm. The OTP will be dynamic and allowed for one-time.
For OTP authentication, the application sends it either via SMS or email. In a previous article, we have seen an example code in PHP to log in by sending OTP via email.
About this example
This example has the user’s database with name, email, password and more details. It has an HTML form with inputs to get the user login credentials.
The PHP code will receive the posted data when the user submits their login details. It compares the entered data against the user database.
If a match is found, then it sets the user login session. This authentication code preserves the user id in a PHP session. The existence of this session will state the user authentication status.
After authentication, the PHP $_SESSION super global variable will contain the user id. The $_SESSION[“member_id”] is set to manage the logged-in session. It will remain until log out or quit the browser.
During logout, we unset all the session variables using the PHP unset() function.
File structure
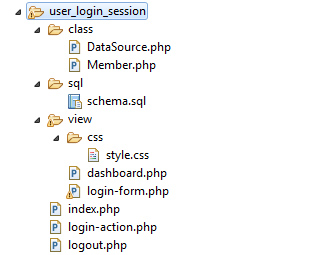
The below screenshot shows the organized file structure of this user login example. The Member.php is the model class with authentication functionalities.
The DataSource.php file contains functions to get a connection and access the database.
In a view directory, I have created all the UI-related files for the login and the dashboard interface. It also contains a stylesheet used for this UI.
The index.php is the landing page that checks the user’s logged-in session. Then it redirects users either to log in or to the dashboard.
The login-action.php and logout.php files are the PHP endpoints. They handle actions as requested by the users via the interactive authentication Interface.
User login interface
Creating an HTML form to log in is the first step. It is to get the login details from users.
This example has two fields, username and password, for user login.
I have specified the validation function and the PHP endpoint with the form tag.
The HTML contains elements to display client-side validation error. Also, it has the code to show a server-side error response based on the login result.
<html>
<head>
<title>User Login</title>
<meta name="viewport" content="width=device-width , initial-scale=1">
<link rel="stylesheet" type="text/css" href="./view/css/form.css" />
<link rel="stylesheet" type="text/css" href="./view/css/style.css" />
</head>
<body>
<div class="phppot-container tile-container text-center">
<?php
if (isset($_SESSION["errorMessage"])) {
?>
<div class="validation-message"><?php echo $_SESSION["errorMessage"]; ?></div>
<?php
unset($_SESSION["errorMessage"]);
}
?>
<form action="login-action.php" method="post" id="frmLogin"
onSubmit="return validate();">
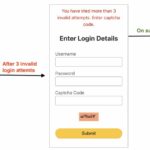
<h2>Enter Login Details</h2>
<div class="row">
<label class="text-left" for="username">Username <span
id="user_info" class="validation-message"></span></label> <input
name="user_name" id="user_name" type="text" class="full-width">
</div>
<div class="row">
<label class="text-left" for="password">Password <span
id="password_info" class="validation-message"></span></label> <input
name="password" id="password" type="password" class="full-width">
</div>
<div class="row">
<input type="submit" name="login" value="Login" class="full-width"></span>
</div>
</form>
</div>
</body>
</html>
Login form validation
This script is for validating the login data on the client side. If the users submit the login with empty fields, this script will return a false boolean.
When it returns false, it displays a validation error message to the users. By returning boolean 0, the form validation script prevents the login from proceeding further.
function validate() {
    var $valid = true;
    document.getElementById("user_info").innerHTML = "";
    document.getElementById("password_info").innerHTML = "";

    var userName = document.getElementById("user_name").value;
    var password = document.getElementById("password").value;
    if (userName == "") {
        document.getElementById("user_info").innerHTML = "required";
        $valid = false;
    }
    if (password == "") {
        document.getElementById("password_info").innerHTML = "required";
        $valid = false;
    }
    return $valid;
}
PHP code to process login
The login-action.php file receives and handles the posted login data. It sends the username and password to the processLogin() function.
This method gets the login details and compares them with the user database.
It prepares a query and binds the login parameters with it to find the match from the database. The processLogin() function will return the result if the login match is found.
On successful login, the login-action.php sets the logged-in user session. Otherwise, it will return an error by saying “Invalid Credentials”.
<?php
namespace Phppot;

require_once __DIR__ . "/class/Member.php";

use Phppot\Member;
if (! empty($_POST["login"])) {
    session_start();

    $member = new Member();
    $isLoggedIn = $member->loginMember();
    if (! $isLoggedIn) {
        $_SESSION["errorMessage"] = "Invalid Credentials";
    }
    header("Location: ./index.php");
    exit();
}
?>
Get logged-in user profile data to display a welcome message
This code is to display the dashboard after login. The PHP code embedded with this HTML is for getting the user session and the user data from the database.
It displays the welcome message by addressing the user with their display name.
The dashboard contains a logout link in addition to the welcome text.
<?php
namespace Phppot;

use Phppot\Member;
if (! empty($_SESSION["userId"])) {
    require_once __DIR__ . '/../class/Member.php';
    $member = new Member();
    $memberResult = $member->getMemberById($_SESSION["userId"]);
    if (! empty($memberResult[0]["display_name"])) {
        $displayName = ucwords($memberResult[0]["display_name"]);
    } else {
        $displayName = $memberResult[0]["user_name"];
    }
}
?>
<html>
<head>
<title>User Login</title>
<link href="./view/css/style.css" rel="stylesheet" type="text/css" />
</head>
<body>
	<div class="phppot-container text-center">
			Welcome <b><?php echo $displayName; ?></b>, You have successfully
			logged in!<br> Click to <a href="./logout.php">Logout.</a>
	</div>
</body>
</html>
Member.php
This is the PHP class created in this example to handle the login process. The getMemberById method request DataSource to fetch the member results.
<?php
namespace Phppot;

use Phppot\DataSource;

class Member
{

    private $dbConn;

    private $ds;

    function __construct()
    {
        require_once __DIR__ . "/DataSource.php";
        $this->ds = new DataSource();
    }

    function getMemberById($memberId)
    {
        $query = "SELECT * FROM registered_users WHERE id = ?";
        $paramType = "i";
        $paramArray = array(
            $memberId
        );
        $memberResult = $this->ds->select($query, $paramType, $paramArray);

        return $memberResult;
    }

    function processLogin($username)
    {
        $query = "SELECT * FROM registered_users WHERE user_name = ?";
        $paramType = "s";
        $paramArray = array(
            $username
        );
        $memberResult = $this->ds->select($query, $paramType, $paramArray);
        return $memberResult;
    }

    function loginMember()
    {
        $memberResult = $this->processLogin($_POST["user_name"]);
        $loginPassword = 0;
        if (! empty($memberResult)) {
            $password = $_POST["password"];
            $hashedPassword = $memberResult[0]["password"];
            if (password_verify($password, $hashedPassword)) {
                $loginPassword = 1;
            }
            if ($loginPassword == 1) {
                $_SESSION["userId"] = $memberResult[0]["id"];
                return $memberResult;
            }
        }
    }
}
?>
Redirect users to log in or Dashboard based on Session
A landing page index.php contains code to check logged-in sessions and route users accordingly. The following code shows how to redirect users based on the session.
<?php
session_start();
if(!empty($_SESSION["userId"])) {
    require_once __DIR__ . '/view/dashboard.php';
} else {
    require_once __DIR__ . '/view/login-form.php';
}
?>
Handling logout in PHP
Clicking the logout link from the dashboard calls this PHP script. This script clears the current login session and redirects users to the login. The logout code is,
<?php
session_start();
$_SESSION["user_id"] = "";
session_destroy();
header("Location: index.php");
?>
DataSource.php
This class establishes a connection object to access the database based on the request. It has the select function to prepare a fetch query to return the results. This class is available in the project download zip linked at the end of this tutorial.
Database script
This script contains the CREATE statement for the registered_users table. Also, it has the data dump to check the example with test login details.
CREATE TABLE `registered_users` (
  `id` int(8) NOT NULL,
  `user_name` varchar(255) NOT NULL,
  `display_name` varchar(255) NOT NULL,
  `password` varchar(255) NOT NULL,
  `email` varchar(255) NOT NULL
) ENGINE=InnoDB DEFAULT CHARSET=latin1 COLLATE=latin1_swedish_ci;

INSERT INTO `registered_users` (`id`, `user_name`, `display_name`, `password`, `email`) VALUES
(1, 'admin', 'Kate Winslet', '$2a$10$0FHEQ5/cplO3eEKillHvh.y009Wsf4WCKvQHsZntLamTUToIBe.fG', 'kate@wince.com');

ALTER TABLE `registered_users`
  ADD PRIMARY KEY (`id`);

ALTER TABLE `registered_users`
  MODIFY `id` int(8) NOT NULL AUTO_INCREMENT, AUTO_INCREMENT=4;
Test login details
After setting this example code and database on your computer, use the following test data to check the example login system.
Username: kate_91
Password: kate@03
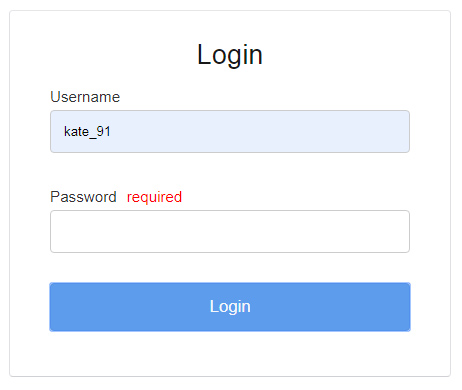
PHP login script with session output
This output screenshot shows the login form interface. It has the input fields to get the user login details.
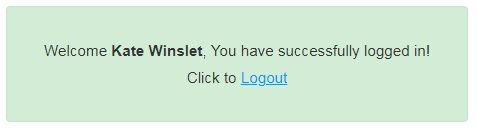
This is the screenshot of the welcome message. Once logged in, the user will see this response in the browser.
This view will show a welcome message by addressing the logged-in user. It also has a link to log out, as shown below.


Thanks for sharing , it helped me a lot in my little project.
what kind of error do you have.?
can you pls share the sql file with download.
thx
Swapnil remember i changed the name of the database to login_script. Keep in touch if you need more help.
what is username and password to login?
Hari,
I assume you are asking for the username and password for your local-database. By default, generally it is “root” and empty password.
Great work!
Thanks.
thank u
very nice was useful..
keep going forward… god bless you at your ideia…
Hi, the page is not redirect to dashboard.php?
Thanks
So did we ever find out why the page does not redirect to the dashboard? I am having the same issue.
TY
Before redirect Header() function b v sure that there is NO NOTHING html code Even space does matter something above the redirect code
My fault, I am missing a row in SQL. it should be OK now.. :)
good work Vincy,
Thank you soo much
Welcome.
hi,,,tnx alot…but still i have a problem in connecting into the database,,,the message INVALID will always pomp up…how can you advice me?
Hi Kevin,
$conn = mysql_connect(“localhost”,”root”,””);
Replace host,username and password specified for mysql_connect(), with your server config.
Love the tutorial, I have a problem though. When I click submit it takes me to the User Dashboard but it is a blank page that just says ‘User Dashboard’ at the top.
Hi
Am Kalidoss from India.
this article very useful for me.. Thank you so much.Am always expecting your new update.
Sure.
logout session not work on mine for some reason i run the code as downloaded form here so i dont know why its not working. i can login in fine but its the login out thats not working
Hi Ragu,
What is happening when you logout. You receive any error?
hello
i have tried this code
but i am getting following warnings
1. message is not defined in
2.Warning: mysql_fetch_array() expects parameter 1 to be resource, boolean given in
Hi Arun,
@Warning: mysql_fetch_array() expects parameter 1 to be resource, boolean given in
This is because of query failure. Before executing this query, ensure that you have users table with respective columns in database, as specified in code.
@message is not defined in
We have to define $message before we use. Otherwise, we need to check $message whether it is set or not. For example,
if(isset($message)) echo $message;
Vincy thanks for the sharing, it was really helpful. keep it up.
i am know of ur form mining but i can’t show error message in the login page($messgae variable data), when i run the login form with wrong information but doesn’t show the message. The message area show all time in this message(Notice: Undefined variable: message in D:DIUwampwwwphptotal_loginIndia_loginformindex.php on line 9 ). How to show check validation message in the login page. Please suggest me. Thanks
Hi vincy.
This tutorial helped me alot .
I would now like to know how do we display the name of the user logged in by hiding the login or signup button and they should reappear when the used loggs out. I have gone through many sites but could not understand.
Would u plz write a code that would help me?
Hi Sumit,
To display logged in username instead of login button,
if($_SESSTION[“username”]) {
echo $_SESSTION[“username”];
} else {
// display login button
}
Make sure, you have stored logged in user name into a session variable while login.
Thank you for your reply vincy,
It helped me alot
keep up the good work.
hi ,,thank u very much,,but i still have problem..ive noticed when i logged out,,and press back it will got an error,,like this Notice: Undefined index: user_name in C:\xampp\htdocs\experiment\samplelogin\user_dashboard.php on line 18
.please help
Hi vhinzlloyd,
If you check user_name session like,
if(isset($_SESSION[“user_name”])) {
instead of
if($_SESSION[“user_name”]) {
you can avoid this error notice.
I keep getting ‘Warning: mysql_fetch_array() expects parameter 1 to be resource, boolean given in x at line x’
How can I fix this?
Hi Michal,
Thank you for the comment.
This tutorial is just to explain login to storing user credentials into session.
We can enhance this code by adding,
and etc. to avoid the security risks. But it will enlarge the code and loose the focus on topic.
Security is more important and let us have separate tutorials to learn how to safeguard from security risk.
Thank you for raising this point.
hi and thanks for the article it is simple and easy-to-understand
but i have a question here in the login redirect part line #4
if(count($_POST)>0)
is it possible to use isset instead of count ?? thanks again.
THANKS
hi,
can yu pls help me wid dis error
” Notice: Undefined index: user_name in C:\xampp\htdocs\b\try\application\views\scripts\index\login.php on line 16 “
Hi, im having trouble with session variable is not passing to the next page,
The code i have is very similar to yours except a few security tweaks
heres my bits n pieces
//Register session variable after db check on authlogin.php page –
———————————
$_SESSION[‘u_name’] = “myusername”;
header(“location:summary.php”);
}
else {
echo “Wrong Username or Password”;
}
———————————
And to validate on the account summary page –
———————————
if($_SESSTION[“u_name”]) {
echo $_SESSTION[“u_name”];
} else {
header(“location:index.php”);
}
———————————
Any help is much aprecciated :D
I want ask 1 question..how to select multiple table from single database to login..?example table group1,group2 and group3.so what php code for this?.
hi these is the error i’m getting
Notice: Undefined index: user_name in D:\xampp\htdocs\login\login.php on line 14
Thank u so much …
thx it was nicely xplained.but im having a problem with logout.
when i logged out and press back button it will again redirect to the user’s account page(Previous Logged in page);
this is the logged out code
Thanks, cool stuff keep it up!
Thanks for tutorial…its great.
Can anyone help me ?.. I need to store all login details in a database.. somebody plz share me the coding if you have
Pretty ideas, The guide saved me out. Oh,Thx alot.
This is one of the best place to learn about web designing especially php and mysql.
This is one of the best blog for developing login form using script. thanks vincy.
by mathivel (php developer)
thanks it is very helpful and informative… =D
Thanks for sharing the wonderful made code.
It saves my day..
Chers
i love this thank You and GOD Bless You
Welcome Chinasa.
What is “namespace Phppot” here?
It is great article by the way thanks :)
namespaces help to encapsulate the code and avoids collision with other code. Check this for more information https://www.php.net/manual/en/language.namespaces.rationale.php
It is very nice to read your site, thank you very much for your work, it’s great!
Thank you and welcome :-)
Hello. Everybody.I’m a new user in this forum.
Welcome Mauroerype.
i always admire beautifying style of girls as compared to men as this website!
Hi Muller,
I take your comment as a happy compliment but kinda doubt it. It is a common saying that girls have good aesthetic sense but I doubt it.
Vincy! You are undoubtedly,extraordinary.
Thank you Neihl.
THANK YOU
Welcome Wael.
Hello Thanks for your effort and knowledge share, i request that you also come up with a log in script while using Microsoft server database
Sure Ronald, I will try to write on the same soon. Thank you.
Great tutorial..
Thank you Zeno.
Great! thank you.
Welcome Shimon