Google reCAPTCHA v3 helps you protect PHP forms without showing a checkbox challenge to every user. It runs in the background, gives each interaction a score, and lets your PHP code decide what to do next.
In this tutorial, I will show you how to add reCAPTCHA v3 to a simple PHP form, generate the token in JavaScript, and verify it securely on the server. The example keeps the code small and practical, so it is easy to test locally and reuse in a real project.
If you are new to key generation, you can also read how to get Google reCAPTCHA site and secret key. For the official behavior and score model, see the Google reCAPTCHA v3 documentation.
Quick answer
To use Google reCAPTCHA v3 in PHP:
- Create a reCAPTCHA v3 site key and secret key for your domain.
- Load the reCAPTCHA JavaScript API with your site key.
- Call
grecaptcha.execute()when the user submits the form. - Send the returned token to PHP.
- Verify the token on the server with Google’s
siteverifyendpoint. - Accept or reject the form by checking
success,score,action, andhostname.
The most important part is the backend check. In reCAPTCHA v3, a successful API response alone is not enough. Your PHP code should also confirm that the score is acceptable and that the returned action matches the action you expected for that form submission.
What this example builds
This example builds a small contact form with:
- a clean PHP front end
- JavaScript-based token generation at submit time
- AJAX form submission
- PHP verification with cURL
- score, action, and hostname validation
- clear success and error responses
I am using one practical flow only. That keeps the tutorial focused on the search intent behind this topic. Most readers looking for “google recaptcha v3 php” want one modern example that works, not two parallel demos that do the same job in different ways.
In a previous article, we saw how to add a Google reCAPTCHA V2 – “I am not a Robot” checkbox to a contact form.
How Google reCAPTCHA v3 works in PHP
reCAPTCHA v3 does not interrupt every visitor with a puzzle. Instead, it watches the interaction, returns a token to the browser, and gives that token a score when your server verifies it.
The score is a value between 0.0 and 1.0. A higher score usually means the request looks more like normal user activity. A lower score means it looks more suspicious.
In a PHP form flow, the steps are simple:
- The page loads the reCAPTCHA JavaScript API with your site key.
- When the user submits the form, JavaScript calls
grecaptcha.execute(). - Google returns a token for that action.
- The token is posted to your PHP script along with the form fields.
- PHP sends the token and secret key to Google for verification.
- PHP checks the response and decides whether to accept the request.
For a safer implementation, do not rely only on success. Also verify these values in PHP:
scoreshould meet your thresholdactionshould match the action name used in JavaScripthostnameshould match your site domain in production
This extra validation makes the integration more reliable and better suited for real forms.
Before you start
You need these items before running the example:
- PHP 7.4 or later
- a local server such as XAMPP, MAMP, WAMP, or PHP built-in server
- a Google reCAPTCHA v3 site key
- a Google reCAPTCHA v3 secret key
This demo does not use a database because it is not required for the search intent of this topic. The main goal here is correct token generation and secure backend verification.
Project files
The downloadable project keeps the code small and easy to follow.
recaptcha-v3-php/
├── index.php
├── verify.php
├── config.sample.php
├── config.php
├── assets/
│   ├── app.js
│   └── style.css
└── README.mdindex.phpshows the form and loads the reCAPTCHA script.verify.phpreceives the AJAX request and verifies the token.config.phpstores your site key, secret key, expected action, and score threshold.assets/app.jshandles token generation and form submission.assets/style.cssadds light styling to keep the demo neat.
Setup steps
- Download the source code zip and extract it into your PHP web root.
- Copy
config.sample.phptoconfig.php. - Add your reCAPTCHA site key and secret key.
- Open the project in your browser.
- Submit the form and review the success or error response.
For local testing, add localhost in your Google reCAPTCHA domain settings. If you want to learn the key generation steps in detail, see this PHP tutorial for getting reCAPTCHA keys.
Create the PHP configuration file
Start by storing the site key, secret key, score threshold, and action name in a separate config file. This keeps the main files cleaner and makes the values easier to update later.
<?php

return [
    'site_key' => 'YOUR_RECAPTCHA_V3_SITE_KEY',
    'secret_key' => 'YOUR_RECAPTCHA_V3_SECRET_KEY',
    'score_threshold' => 0.5,
    'expected_action' => 'contact_form',
    'expected_hostname' => ''
];
Replace the placeholder keys with your own values.
The expected_hostname value can stay empty during local testing. In production, set it to your real domain so your PHP verification can confirm that the token was issued for the correct host.
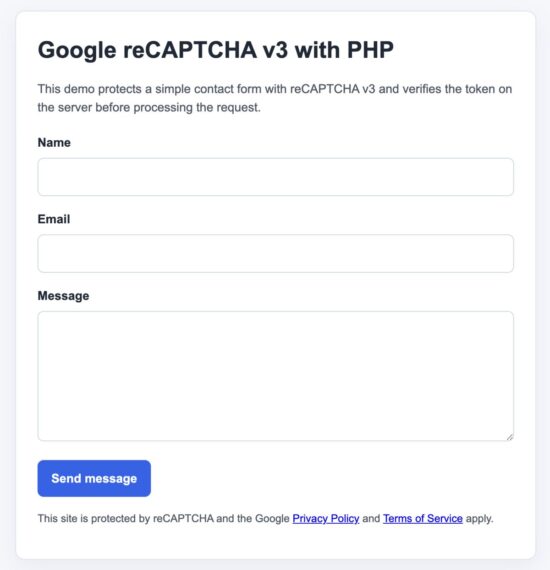
Create the HTML form (index.php)
This file renders a simple contact form and loads the reCAPTCHA v3 script. The token is generated only when the user submits the form.
<?php
$config = require __DIR__ . '/config.php';
?>

<!DOCTYPE html>
<html lang="en">
<head>
    <meta charset="UTF-8">
    <title>reCAPTCHA v3 PHP Demo</title>
    <link rel="stylesheet" href="assets/style.css">

    <script src="https://www.google.com/recaptcha/api.js?render=<?php echo htmlspecialchars($config['site_key']); ?>"></script>
</head>
<body>

<div class="container">
    <h2>Contact Form</h2>

    <form id="contactForm">
        <div class="form-group">
            <label>Name</label>
            <input type="text" name="name" required>
        </div>

        <div class="form-group">
            <label>Email</label>
            <input type="email" name="email" required>
        </div>

        <div class="form-group">
            <label>Message</label>
            <textarea name="message" rows="4" required></textarea>
        </div>

        <button type="submit">Send Message</button>
    </form>

    <div id="responseBox" class="response-box"></div>
</div>

<script>
    const SITE_KEY = "<?php echo htmlspecialchars($config['site_key']); ?>";
    const ACTION_NAME = "<?php echo htmlspecialchars($config['expected_action']); ?>";
</script>

<script src="assets/app.js"></script>

</body>
</html>
The key part here is the script URL:
?render=SITE_KEYloads reCAPTCHA v3- No checkbox is shown to the user
Generate token and submit form (JavaScript)
Now we generate the token when the form is submitted and send it along with the form data to PHP.
document.getElementById('contactForm').addEventListener('submit', function (e) {
    e.preventDefault();

    grecaptcha.ready(function () {
        grecaptcha.execute(SITE_KEY, { action: ACTION_NAME }).then(function (token) {

            const form = document.getElementById('contactForm');
            const formData = new FormData(form);

            formData.append('recaptcha_token', token);
            formData.append('recaptcha_action', ACTION_NAME);

            fetch('verify.php', {
                method: 'POST',
                body: formData
            })
            .then(response => response.json())
            .then(data => {
                const box = document.getElementById('responseBox');
                box.style.display = 'block';

                if (data.success) {
                    box.className = 'response-box success';
                    box.innerText = data.message;
                    form.reset();
                } else {
                    box.className = 'response-box error';
                    box.innerText = data.message;
                }
            })
            .catch(() => {
                const box = document.getElementById('responseBox');
                box.style.display = 'block';
                box.className = 'response-box error';
                box.innerText = 'Request failed. Try again.';
            });

        });
    });
});
Important points in this step:
- The token is generated at submit time, not on page load
- The
actionvalue is passed to both JavaScript and PHP - The token is sent securely to the server for verification
Verify reCAPTCHA in PHP (verify.php)
This is the most important part. PHP sends the token to Google and validates the response.
<?php

header('Content-Type: application/json');

$config = require __DIR__ . '/config.php';

$token = $_POST['recaptcha_token'] ?? '';
$action = $_POST['recaptcha_action'] ?? '';

if (!$token) {
    echo json_encode([
        'success' => false,
        'message' => 'Missing reCAPTCHA token'
    ]);
    exit;
}

$verifyUrl = 'https://www.google.com/recaptcha/api/siteverify';

$postData = http_build_query([
    'secret' => $config['secret_key'],
    'response' => $token,
    'remoteip' => $_SERVER['REMOTE_ADDR'] ?? ''
]);

$ch = curl_init();
curl_setopt($ch, CURLOPT_URL, $verifyUrl);
curl_setopt($ch, CURLOPT_POST, true);
curl_setopt($ch, CURLOPT_POSTFIELDS, $postData);
curl_setopt($ch, CURLOPT_RETURNTRANSFER, true);

$response = curl_exec($ch);
curl_close($ch);

$result = json_decode($response, true);

if (!$result || empty($result['success'])) {
    echo json_encode([
        'success' => false,
        'message' => 'reCAPTCHA verification failed'
    ]);
    exit;
}

/* Validate action */
if ($result['action'] !== $config['expected_action']) {
    echo json_encode([
        'success' => false,
        'message' => 'Invalid reCAPTCHA action'
    ]);
    exit;
}

/* Validate score */
if ($result['score'] < $config['score_threshold']) {
    echo json_encode([
        'success' => false,
        'message' => 'Suspicious activity detected (low score)'
    ]);
    exit;
}

/* Optional hostname check (recommended for production) */
if (!empty($config['expected_hostname']) &&
    $result['hostname'] !== $config['expected_hostname']) {

    echo json_encode([
        'success' => false,
        'message' => 'Invalid hostname'
    ]);
    exit;
}

/* If all checks pass */
echo json_encode([
    'success' => true,
    'message' => 'Form submitted successfully'
]);
This PHP validation is what makes reCAPTCHA v3 effective. It checks not just whether the API responded, but whether the request looks genuine.
How the flow works together
At this point, your form, JavaScript, and PHP are all connected. Here is a quick summary of the full flow:
- User fills the form and clicks submit
- JavaScript calls
grecaptcha.execute() - Google returns a token
- The token is sent to
verify.php - PHP sends the token to Google for verification
- Google returns score, action, hostname, and status
- PHP validates the response and returns JSON
- The UI shows success or error
This is the correct pattern for reCAPTCHA v3. The browser only generates the token. The server makes the final decision.
Test the example
After setup, open the form in your browser and submit it.
You should see either a success message or an error message based on the verification result.
If you want to understand how Google evaluates traffic, you can also check your reCAPTCHA admin console. It shows score distribution and helps you tune your threshold.
If you are looking for the code code to integrate Google Recaptcha V3 in a Laravel application, the linked article has the guidance.
Form submission success after reCAPTCHA verification
Choosing the right score threshold
The score threshold controls how strict your validation is.
- 0.9 to 1.0 very strict, may block real users
- 0.5 balanced default for most forms
- 0.3 more lenient, allows more traffic
Start with 0.5 and adjust based on real usage. If your form gets spam, increase the threshold. If real users are blocked, lower it slightly.
reCAPTCHA v3 is not about blocking everything. It helps you decide what to trust.
Security considerations
To use reCAPTCHA v3 safely in PHP, follow these rules:
- Always verify the token on the server. Never trust client-side checks.
- Validate the
actionvalue. This prevents token reuse across different forms. - Check the
scoreinstead of onlysuccess. - Validate the
hostnamein production. - Do not expose your secret key in frontend code.
- Use HTTPS in production.
reCAPTCHA v3 is a signal, not a full security solution. You can combine it with rate limiting, logging, or email verification for better protection.
Common errors and fixes
- Invalid domain for site key
Add your domain (or localhost) in the Google reCAPTCHA admin panel. - Missing token in PHP
Make sure the token is appended in JavaScript before sending the request. - Score always low
Check your traffic patterns. Test in a real browser, not only via scripts. - Action mismatch error
Ensure the action name is the same in JavaScript and PHP config. - cURL not working
Enable cURL extension in PHP or usefile_get_contents()as fallback.
Developer FAQ
Do I need a database for reCAPTCHA v3?
No. reCAPTCHA only validates the request. You can store form data after successful verification if needed.
Can I use reCAPTCHA v3 without JavaScript?
No. The token generation requires JavaScript. Without it, reCAPTCHA v3 will not work.
Is reCAPTCHA v3 better than v2?
v3 gives a smoother user experience because there is no checkbox. But it needs proper backend validation and tuning.
Can bots bypass reCAPTCHA v3?
Advanced bots may still pass. That is why score checking and additional security layers are important.
Download source code
You can download the complete working project from the link below.
Download Google reCAPTCHA v3 PHP example (ZIP)
The package includes all files, setup steps, and a ready-to-run demo. You can plug this into your own PHP form and adjust the threshold or validation rules as needed.


Dear Vincy,
One of the best article in the internet.
Thanks a lot for your help.
Welcome, Adolf Ezeribe.
This worked probably since it was recently updated, unlike most other online sources
Thank you.