In general, Google Analytics provides aggregate statistics. It gives us enormous ability and insights into the website traffic. Is it really possible to track individual users in Google Analytics? Yes.
Its a big YES! Because, some of the forums claim that it is not possible. It is possible if your application has a login (authentication) mechanism and you have a member based application.
For example, yours is a task management application or a shopping cart where you have registered users, sign in and use the application. In such a scenario Google Analytics can be used to measure and track the individual logged in users. And we are going to see how to implement it in this article.
“To measure is to know – if you cannot measure it, you cannot improve it” – Lord Kelvin.
I will be demonstrating this via Google Universal Analytics and not the Google Tag Manager. Both are completely different tools. Google tag manager is like a container for adding different tags.
Wherein Google Analytics is one such tag that is used to collect and analyze your website traffic.
Steps to Track Individual Logged in Users
- Login Google Analytics and then create an Account.
- Create Property.
- Create View with User-ID enabled.
- Create Custom Dimensions to track user types.
- Modify tracking code to include user-id and custom dimensions.
- Create custom reports, view and analyze data.

1. Login Google Analytics and then create an Account
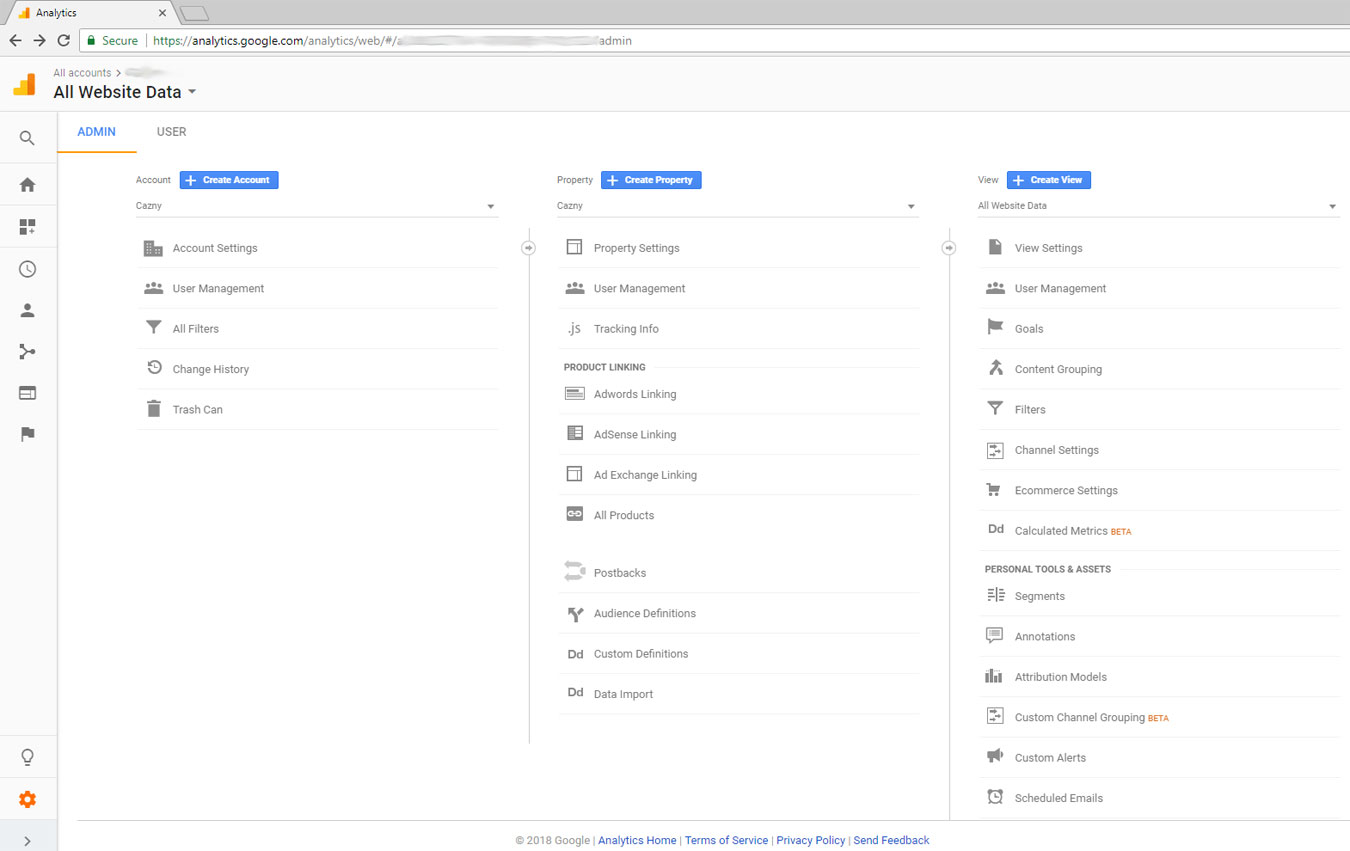
This step is standard and if you are not a beginner, just skip this and jump direct to step 3 to create the view. In this step, just login to Google Analytics and create an account for tracking your website or application.
Refer the image below for help. Click the “Create Account” to create a new tracking account.
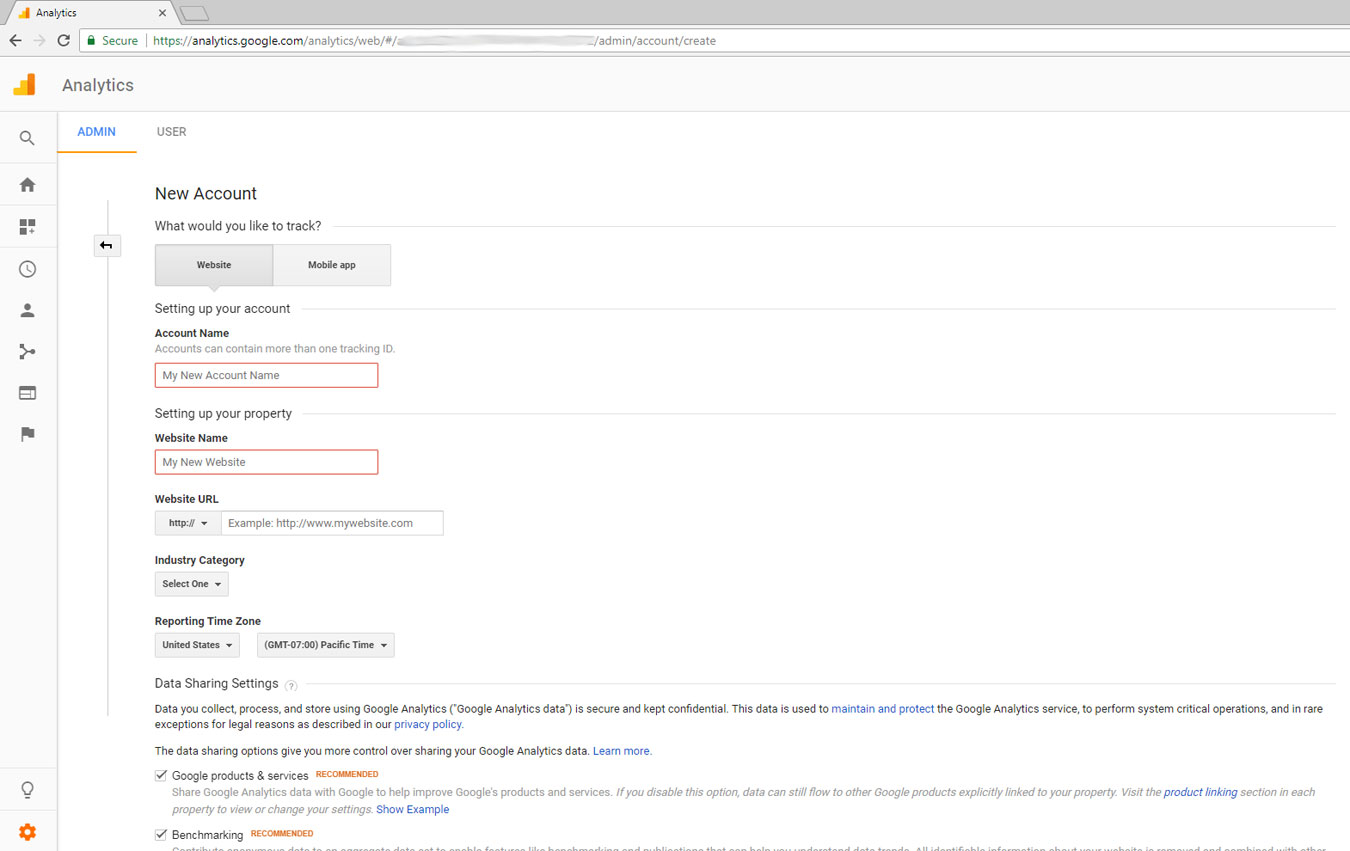
2. Create Property
Following screen shows how you create account information. Following this step, create a new property as the same way you did with this account creation.
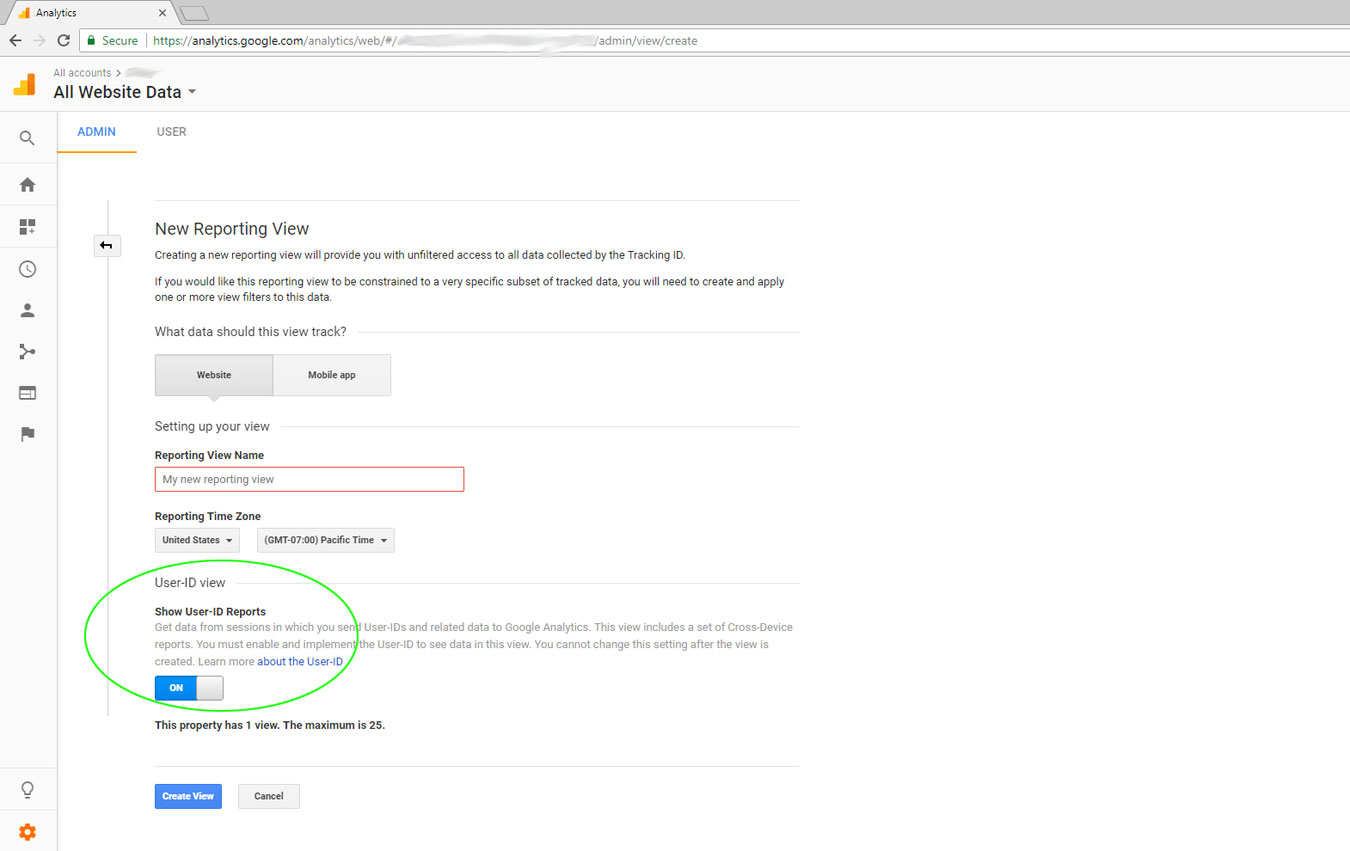
3. Create View with User-ID enabled
This is the step where we are actually stepping into the user id tracking. Generally when you create a view by default the User-id option is off. Now you need to switch it on to track individual users.
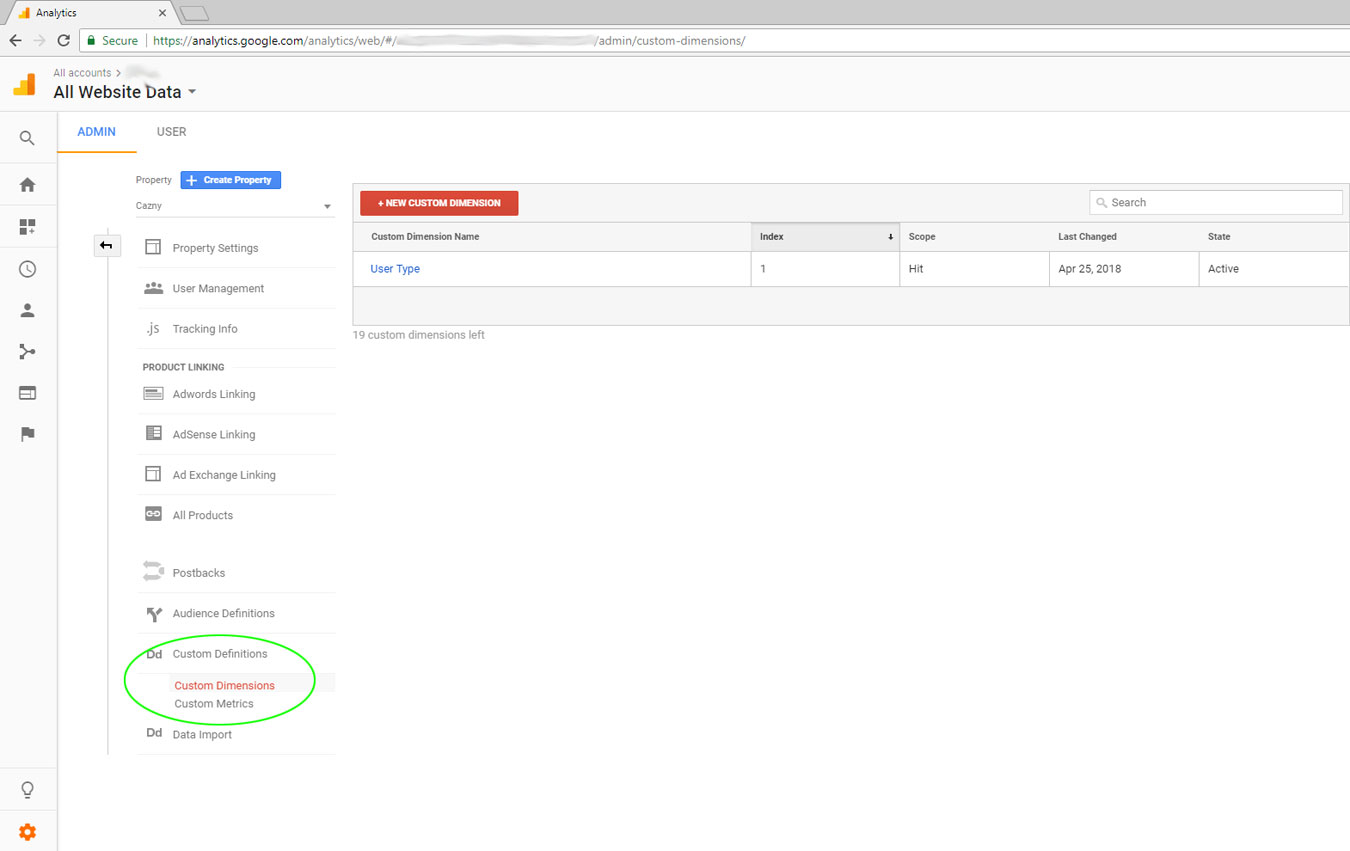
4. Create Custom Dimensions to Track User Types
Then you need to create custom dimensions. Google analytics by default has metrics and dimensions. We need to create custom dimension to capture and send data to Google about the logged-in user.
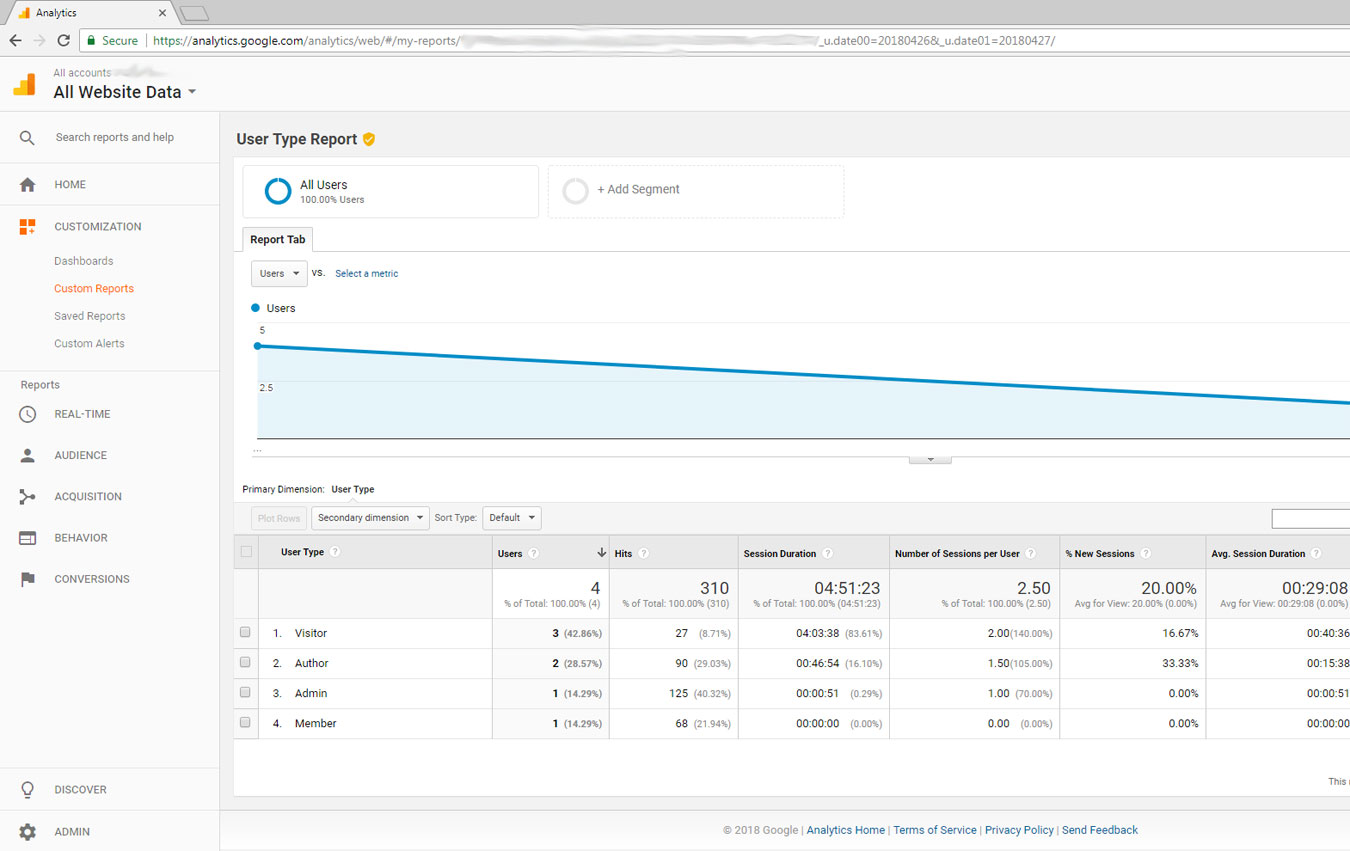
For example, consider we have different types of users like, general user who do not login but use the site anonymously. Then we have general basic members, authors and admin. So three types of logged-in users. This is just for example sake.
You might be having only one type ( just logged-in user). For any case, you need to create a dimension as user-type. Because, we are going to supply the different user types as values.
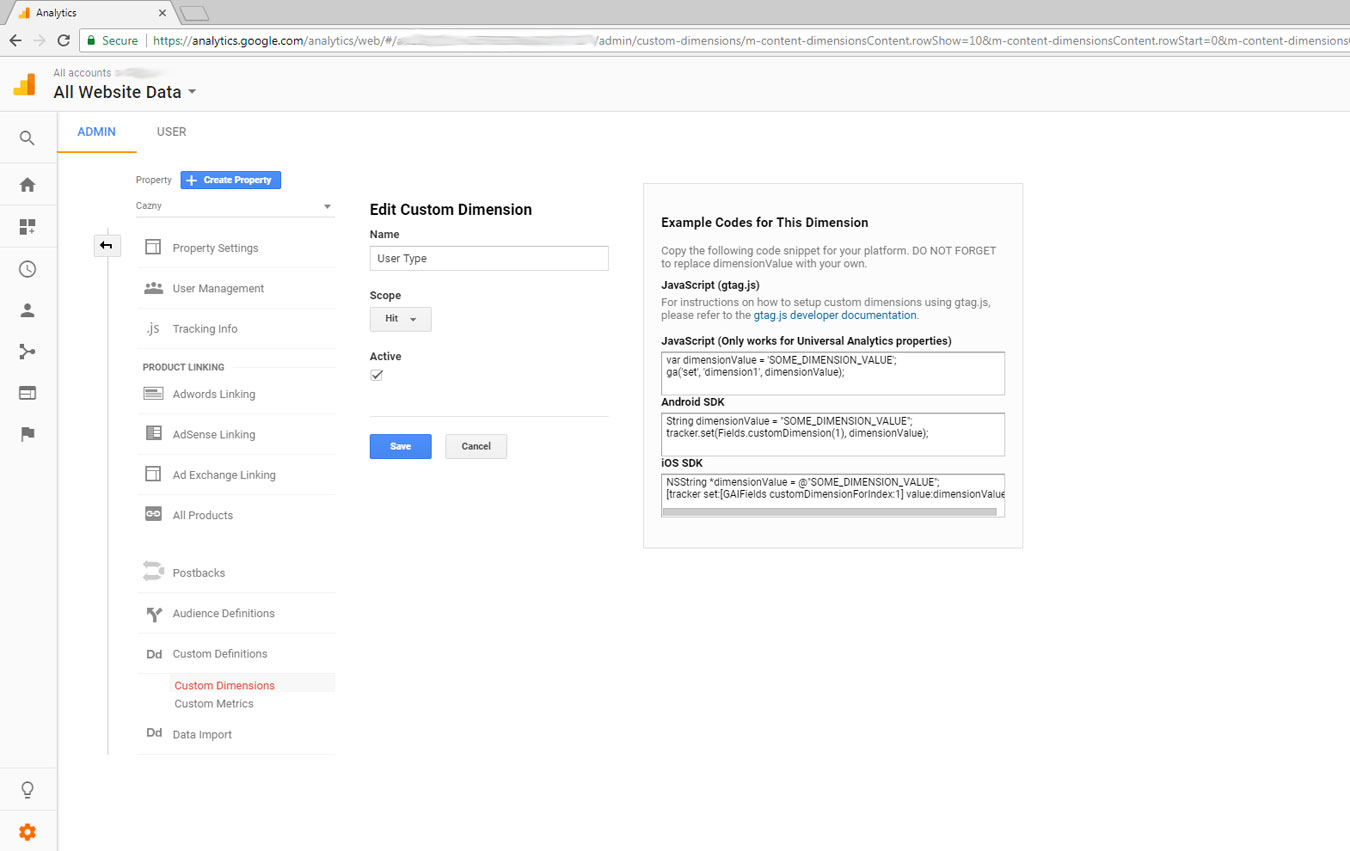
5. Modify tracking code to include logged in user-id and custom dimensions
From the above step, we have got the code for adding the dimension.
ga('set', 'dimension1', dimensionValue);This is the code that needs to be added to your Google Analytics tracking code. Here ‘dimension1’ represents the custom dimension you have created in the previous step. In our example, it is ‘User Type’. dimensionValue can be {‘Anonymous User’, ‘Member’, ‘Author’, ‘Admin’} as per the state of your application. Using your application login session etc, you can supply that value.
You should be using Google Universal Analytics and the tracking code will be as below for a non-logged in user. You should substitute your UA-id in the below code.
<script>
(function(i,s,o,g,r,a,m){i['GoogleAnalyticsObject']=r;i[r]=i[r]||function(){
(i[r].q=i[r].q||[]).push(arguments)},i[r].l=1*new Date();a=s.createElement(o),
m=s.getElementsByTagName(o)[0];a.async=1;a.src=g;m.parentNode.insertBefore(a,m)
})(window,document,'script','https://www.google-analytics.com/analytics.js','ga');
ga('create', 'UA-1111112345-1', 'auto');
ga('set', 'dimension1', 'Visitor');
ga('send', 'pageview');
</script>
For a logged-in user, it will be as below. You should not the line where we are setting the ‘userId’ field and its value as ‘147’. This 147 is the ID within our application like a primary key that is used to individually identify an user.
You should not set it as email or other common information using which Google can identify an user and its violation of agreement. The value should be strictly in the context of your application and it should not make any sense for Google.
Then the next thing you should not is the value set for the ‘dimension1’ as ‘Author’.
<script>
 (function(i,s,o,g,r,a,m){i['GoogleAnalyticsObject']=r;i[r]=i[r]||function(){
 (i[r].q=i[r].q||[]).push(arguments)},i[r].l=1*new Date();a=s.createElement(o),
 m=s.getElementsByTagName(o)[0];a.async=1;a.src=g;m.parentNode.insertBefore(a,m)
 })(window,document,'script','https://www.google-analytics.com/analytics.js','ga');
ga('create', 'UA-1111112345-2', 'auto');
 ga('set', 'userId', '147');
 ga('set', 'dimension1', 'Author');
 ga('send', 'pageview');
 </script>
6. Create custom reports, view and analyze data
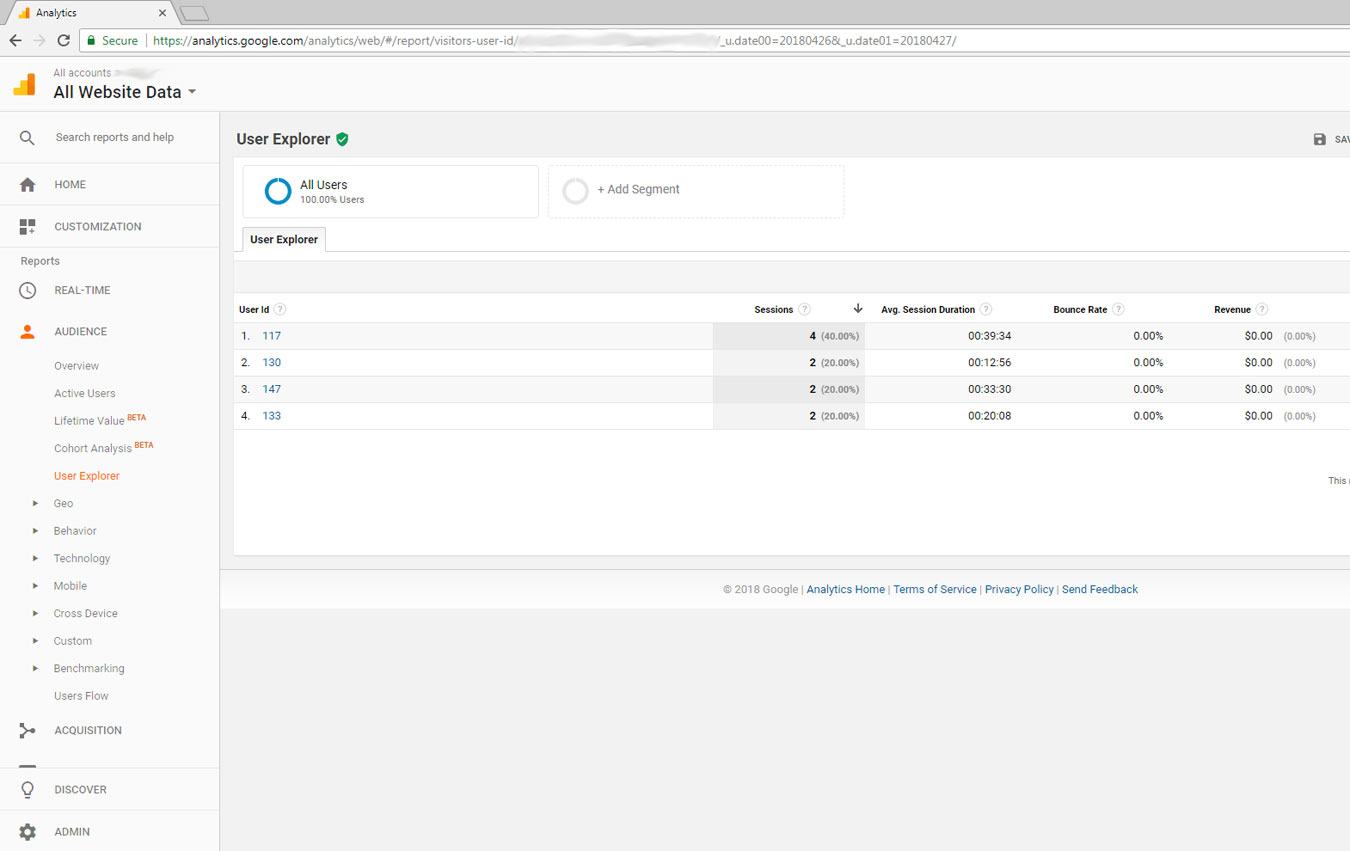
Now the data is captured and sent to the Google for tracking a logged-in user. How are we going to extract that information back. Google provides a ‘User Explorer’ and we can also create custom reports.
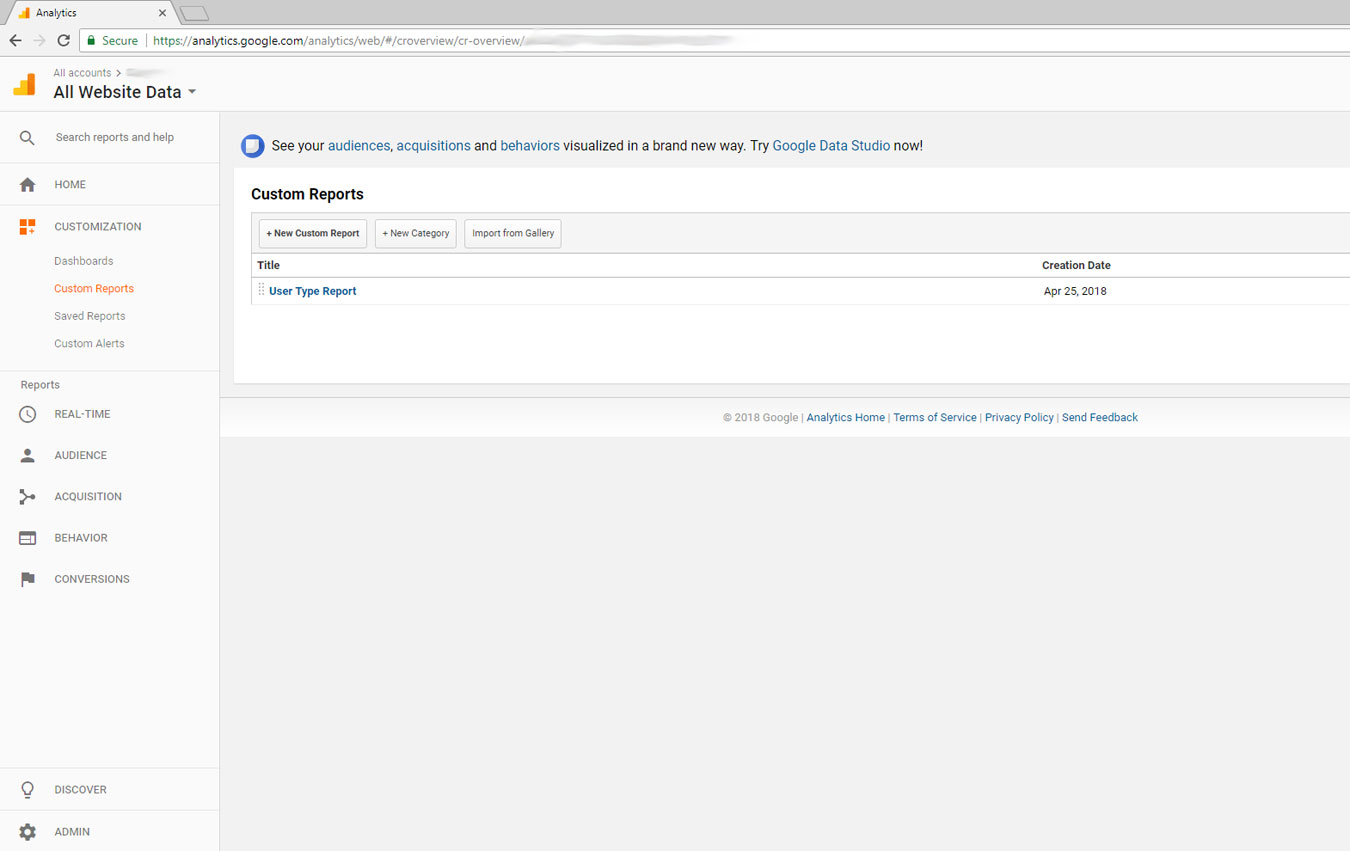
Now lets check the Google Analytics provided ‘User Explorer’ report. You can see the User id that is passed from the application.
When you use this feature, you need to use it responsibly. You should get explicit permission from the user highlighting them the that you are using this user-id feature. Ensure that it is legal in your region.
Do not pass generally personally identifiable information to Google other than your system based ids.