The Foundation front-end framework is one of the popular choices these days to build the UI. It provides front-end templates, UI components, building blocks and etc.
This framework helps to build modern, responsive UI templates for websites and applications.
It provides customizable UI blocks and supports building a website easily. It has the code snippet for displaying form overlay, site menu and more.
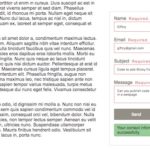
If you want to build a responsive contact form in PHP without using any frameworks or plugins, the linked article has one.

What is inside?
- About this contact form example
- Features of Foundation framework
- How to integrate the Foundation framework?
- Front-end themes with Foundation framework classes
- Configure form rendering directives
- Contact form backend routine (validation, mail sending)
- Output: Contact form using Foundation
About this contact form example
This example is to build a responsive contact form template using the Foundation front-end framework.
This example supports expandable contact form UI by clicking a contact icon. We can make the contact icon float on page scroll and slide in a contact form on click.
The expandable feature is customizable based on the configuration. Rather, it displays the form fields by default.
For letting the contact form expandable, this example uses one of the Foundation form building blocks. It customizes the “Expandable Search Form” template to replicate it for a contact form.
It also covers the back-end routines required for a simple contact form to send mail on submit.
Features of Foundation framework
The Foundation framework is one of the front-end components that gives unimaginable support in building the UI. It’s because of the leading UI frameworks like Bootstrap.
It’s a feature-packed framework that provides various UI components, smooth, animated, responsive block and more.
The below list of items shows some of the highlights of this framework.
- It provides responsive templates for websites, mobile apps and emails.
- It gives easy customizable and understandable UI components and code snippets.
- It’s a well-documented tool that showcases its utilities and its developed building blocks.
- Dynamic preview with code helps developers/designers to choose the components.
- Easy installable tool into an application.
- It accelerates the designing process and reduces the effort with the pre-built UI blocks.
How to install the Foundation framework?
Installing Foundation for a site is a simple step. There are many ways given in the installation document.
I have used the following command to install this framework via npm.
npm install foundation-sites
It supports to install via various package managers yarn, composer and more. It also provides Foundation CLI command to integrate this framework.
There are CDN links to plugin this framework assets into an application.
<!-- Compressed CSS -->
<link rel="stylesheet" href="https://cdn.jsdelivr.net/npm/foundation-sites@6.6.3/dist/css/foundation.min.css" integrity="sha256-ogmFxjqiTMnZhxCqVmcqTvjfe1Y/ec4WaRj/aQPvn+I=" crossorigin="anonymous">

<!-- Compressed JavaScript -->
<script src="https://cdn.jsdelivr.net/npm/foundation-sites@6.6.3/dist/js/foundation.min.js" integrity="sha256-pRF3zifJRA9jXGv++b06qwtSqX1byFQOLjqa2PTEb2o=" crossorigin="anonymous"></script>
Front-end themes with Foundation framework classes
In this HTML code, it has the contact form template. It imports the Foundation framework assets, the basic CSS and the JavaScript.
It uses the Foundation framework classes to create the form groups and align the fields into them.
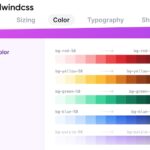
In a previous code, I have created a responsive contact form with Tailwind CSS.
Also, it uses the predefined semantic classes for displaying responses after the form validation and server-side action.
There are two types of form rendering in this example. One is to render form on loading the page itself. The other is to render the form by clicking an icon on the landing page.
This script embeds PHP conditional blocks to check the directive state to apply the corresponding rendering.
It loads Foundation SCSS assets conditionally to display the expandable contact form.
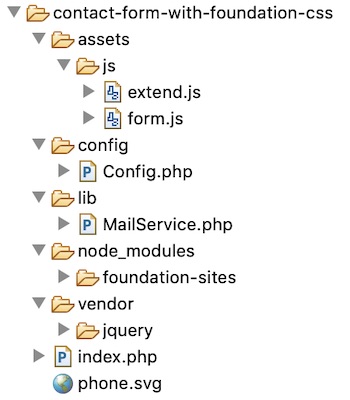
index.php
<html>
<head>
<title>Contact Us Form</title>
<meta charset="UTF-8" />
<meta name="viewport" content="width=device-width, initial-scale=1.0" />
<script src="vendor/jquery/jquery-3.2.1.min.js"></script>
<script src="node_modules\foundation-sites\dist\js\foundation.js"></script>
<link rel="stylesheet"
    href="node_modules\foundation-sites\dist\css\foundation.css" />
<link rel="stylesheet"
    href="node_modules\foundation-sites\dist\css\foundation-prototype.css" />
<?php
if (Config::ENABLE_EXTENDED_FORM == true) {
    ?>
    <link rel="stylesheet"
    href="node_modules\foundation-sites\assets\foundation.scss" />
            <?php } ?>
<style>
.expand-search {
    padding: 1rem;
    margin-left: 0px;
}

.contact-form-field {
    margin-left: 0px;
}
#submit-btn {
    padding: 0px;
}
</style>
</head>
<body>
    <div class="grid-container">
        <h3>PHP contact form with foundation css</h3>
		<?php
if (Config::ENABLE_EXTENDED_FORM == true) {
    ?>
    	<div class="input-group searchbar">
            <div class="input-group-button">
                <button class="button search">
                    <svg xmlns="http://www.w3.org/2000/svg" width="24"
                        height="24" viewBox="0 0 24 24" fill="white"
                        stroke="currentColor" stroke-width="2"
                        stroke-linecap="round" stroke-linejoin="round"
                        class="feather feather-phone">
						<path
                            d="M22 16.92v3a2 2 0 0 1-2.18 2 19.79 19.79 0 0 1-8.63-3.07 19.5 19.5 0 0 1-6-6 19.79 19.79 0 0 1-3.07-8.67A2 2 0 0 1 4.11 2h3a2 2 0 0 1 2 1.72 12.84 12.84 0 0 0 .7 2.81 2 2 0 0 1-.45 2.11L8.09 9.91a16 16 0 0 0 6 6l1.27-1.27a2 2 0 0 1 2.11-.45 12.84 12.84 0 0 0 2.81.7A2 2 0 0 1 22 16.92z"></path></svg>
                </button>
            </div>

        </div>
    <?php
}
?>
		<div class="large-2 cell">
            <form data-abide name="frmContact"
                class="callout radius bordered search-field"
                id="contact-form" method="post" action=""
                enctype="multipart/form-data"
                onsubmit="return validateContactForm()">
                <div class="grid-x">
                    <div class="large-2 cell">
                        <label class="contact-form-field"> Name <span
                            class="form-error" id="userName-info"
                            role="alert"></span>
                        </label> <input type="text"
                            class="radius bordered search-field"
                            name="userName" id="userName"
                            aria-describedby="example1Hint1"
                            aria-errormessage="example1Error1"
                            value="<?php if(!empty($_POST['userName'])&& $type == 'error'){ echo $_POST['userName'];}?>" />
                    </div>
                </div>
                <div class="grid-x">
                    <div class="large-2 cell">
                        <label class="contact-form-field"
                            for="last_name"> Email <span
                            id="userEmail-info" class="form-error"></span>
                        </label> <input type="text"
                            class="radius bordered search-field"
                            name="userEmail" id="userEmail"
                            value="<?php if(!empty($_POST['userEmail'])&& $type == 'error'){ echo $_POST['userEmail'];}?>" />
                    </div>
                </div>
                <div class="grid-x">
                    <div class="large-2 cell">
                        <label class="contact-form-field"
                            for="last_name"> Subject <span
                            id="subject-info" class="form-error"></span>
                        </label> <input type="text"
                            class="radius bordered search-field"
                            name="subject" id="subject"
                            value="<?php if(!empty($_POST['subject'])&& $type == 'error'){ echo $_POST['subject'];}?>" />
                    </div>
                </div>
                <div class="grid-x">
                    <div class="large-3 cell">
                        <label class="contact-form-field"
                            for="last_name"> Message <span
                            id="userMessage-info" class="form-error"></span>
                        </label>

                        <textarea name="content" id="content"
                            class="radius bordered search-field"
                            cols="20" rows="5"><?php if(!empty($_POST['content'])&& $type == 'error'){ echo $_POST['content'];}?></textarea>
                    </div>
                </div>
                <div id="submit-btn">
                    <input type="submit" name="send"
                        class="button radius bordered success"
                        value="Send" />
                </div>

            </form>
        </div>
		<?php if(!empty($message)) { ?>
		<div data-alert class="button round <?php  echo $type; ?> alert-box"><?php if(isset($message)){ ?>
				    <?php echo $message; }?>

                    </div><?php }?>
	</div>
    <script src="assets/js/form.js"></script>

        <?php
if (Config::ENABLE_EXTENDED_FORM == true) {
    ?>
	<script src="assets/js/extend.js"></script>
    <?php }?>

</body>
</html>
Configure form rendering directives
The ENACME_EXTENDED_FORM constant is possible to have the boolean true/false value. This is to switch on/off the form expandable feature of this example.
When it is true, the landing page will display a clickable contact icon to expand the contact form. In a previous article, we have seen how to show a slide-in contact form using jQuery.
If it is false, the contact form will render on the page load itself.
config/Config.php
<?php
namespace Phppot;

class Config
{

    const ENABLE_EXTENDED_FORM = true;
}
?>
Contact form backend routine (validation, mail sending)
Hereafter we are going to see some common client and server-side handlers used for a simple contact form.
In most of the contact form example code, we have seen earlier uses these handlers.
These are to validate the form on the client-side on submitting the form. Also, it shows the PHP mail sending script to send the entered contact details via email.
Client-side Form Validation
This is the form validation script. It uses jQuery to check the form-field whether they are empty.
All the fields in the contact form are mandatory. If the user left any one of them and tried to submit, then this script will return boolean false and stop submission.
It also displays error messages to the user to let them know what’s wrong.
assets/js/form.js
function validateContactForm() {
	var valid = true;
	$("#userName").removeClass("is-invalid-input");
	$("#userEmail").removeClass("is-invalid-input");
	$("#subject").removeClass("is-invalid-input");
	$("#content").removeClass("is-invalid-input");

	$("#userName-info").html("").hide();
	$("#userEmail-info").html("").hide();
	$("#subject-info").html("").hide();
	$("#content-info").html("").hide();

	$(".form-error").html("");
	$(".phppot-input").css('border', '#E0DFDF 1px solid');
	var userName = $("#userName").val();
	var userEmail = $("#userEmail").val();
	var subject = $("#subject").val();
	var content = $("#content").val();

	if (userName.trim() == "") {
		$("#userName-info").html("required.").show();
		$("#userName").addClass("is-invalid-input");

		valid = false;
	}
	if (userEmail.trim() == "") {
		$("#userEmail-info").html("required.").show();
		$("#userEmail").addClass("is-invalid-input");

		valid = false;
	}
	if (!userEmail.match(/^([\w-\.]+@([\w-]+\.)+[\w-]{2,4})?$/)) {
		$("#userEmail-info").html("invalid email address.").show();
		$("#userEmail").addClass("is-invalid-input");
		valid = false;
	}

	if (subject == "") {
		$("#subject-info").html("required.").show();
		$("#subject").addClass("is-invalid-input");

		valid = false;
	}
	if (content == "") {
		$("#userMessage-info").html("required.").show();
		$("#content").addClass("is-invalid-input");

		valid = false;
	}
	if (valid == false) {
		$('.error-field').first().focus();
		valid = false;
	}
	return valid;
}
assets/js/extend.js
$(document).foundation();
$(function() {
	toggleContainerHeight();

	$('.search').bind('click', function(event) {
		$(".search-field").toggleClass("expand-search");
		$(".contact-form-field").toggleClass("contact-form");
		$("label").toggle();
		$("#submit-btn").toggle();

		toggleContainerHeight();
	})
});

function toggleContainerHeight() {
	if ($(".search-field").hasClass("expand-search")) {
		$("form.search-field").css("height","unset");
	} else {
		$("form.search-field").css("height","0");
	}
}
Mail sending script in PHP
This PHP script is to call the mail-sending service handler when the users post the contact form data to the server.
On sending the email, the handler will return the response. Based on this response this script will set the response type to success or error.
index.php (PHP code to call mail service to send email)
namespace Phppot;

use Phppot\Config;
require_once ("config/Config.php");
require_once ("lib/MailService.php");
$mailService = new MailService();
if($_SERVER['REQUEST_METHOD'] == 'POST') {
    $response = $mailService->sendContactMail($_POST);
    if (empty($response)) {
        $message = "Hi, we have received your message. Thank you.";
        $type = "success";
    } else {
        $type = "alert";
        $message = "Problem in sending email. Try again.";
    }
}
?>
PHP mail service class
This PHP class has the mail sending function. It uses the core PHP mail() function.
lib\MailService.php
<?php
namespace Phppot;

class MailService
{

    function sendContactMail($postValues)
    {
        $name = $postValues["userName"];
        $email = $postValues["userEmail"];
        $subject = $postValues["subject"];
        $content = $postValues["content"];

        $toEmail = "ADMIN_EMAIL";
        $mailHeaders = "From: " . $name . "<" . $email . ">\r\n";
        $response = mail($toEmail, $subject, $content, $mailHeaders);
        return $response;
    }
}
?>
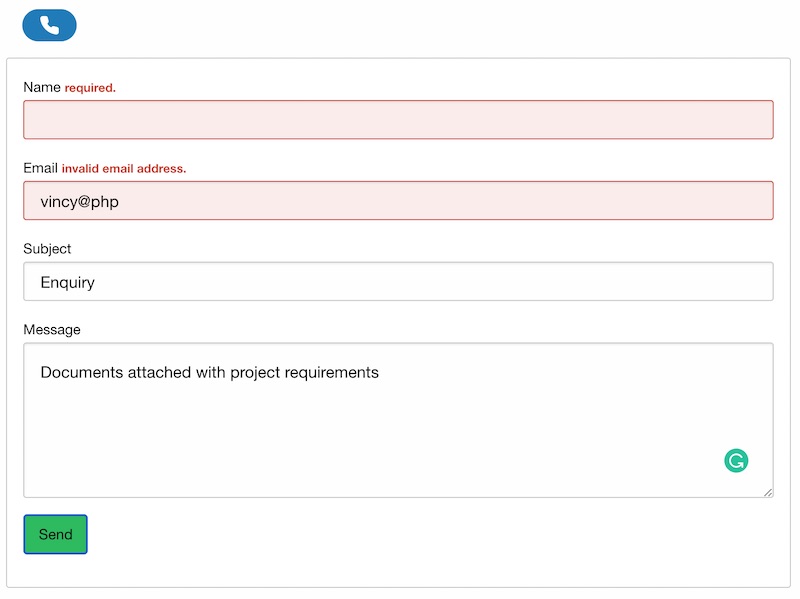
Output: Contact form using Foundation
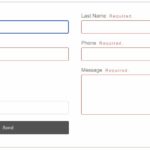
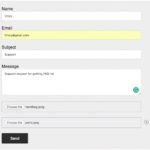
The below screenshot shows the contact form output. It displays how the Foundation framework styles applied to design a responsive contact form.
This form template screenshot shows the error field’s look and field. It uses the framework classes to differentiate the wrongly entered field data.
Conclusion
This article has described the steps to create a responsive contact form with the Foundation front-end framework.
It has created a simple understandable example code that makes the readers get started with this advanced front-end framework.
We have seen the integration procedure with a specific package manager tool. Also, we have seen the CDN source of this framework dependencies.
Hope you enjoyed this article and gained basic knowledge about the Foundation UI framework. Rock on!
Download

I would like to learn more about your services.
Hi Amber,
Kindly check this page to know more about my services https://phppot.com/work-with-me/ If you need more info, please feel free to contact me.