Restoring database via a program can be used in an application where dynamic loading is required. It can also be used to build a custom MySQL client application.
I have already written about taking backup of a database through code, in the article How to Backup MySQL Database using PHP and you can download the code and play with it.
The database backup file which is to be restored is chosen and sent to the PHP code via a HTML form. In PHP code, the file type is validated as we have done for the images uploaded via TinyMCE Editor.
After validation, PHP function reads SQL file and returns the array of SQL queries. This array is iterated and the query is executed on each iteration to restore the complete database.
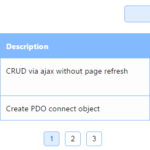
This screenshot shows the form with input file type to choose the database backup source.

HTML Form to Upload Database Backup File
This HTML code is for the creating the user interface with the form to upload the MySQL database SQL backup file and submit it to restore the database. After a successful restore, we acknowledge the user with the response returned from the PHP using this UI.
<?php
if (! empty($response)) {
    ?>
<div class="response <?php echo $response["type"]; ?>
    ">
    <?php echo nl2br($response["message"]); ?>
</div>
<?php
}
?>
<form method="post" action="" enctype="multipart/form-data"
    id="frm-restore">
    <div class="form-row">
        <div>Choose Backup File</div>
        <div>
            <input type="file" name="backup_file" class="input-file" />
        </div>
    </div>
    <div>
        <input type="submit" name="restore" value="Restore"
            class="btn-action" />
    </div>
</form>
PHP Code to Restore MySQL Database
This PHP code receives the uploaded file blob and validates the file type before processing database restore. If the uploaded file is not with the .sql extension, then the error response will be sent to the user.
Otherwise, the file will be parsed store all the queries into an array. Then these queries are executed in a loop to restore the database.
<?php
$conn = mysqli_connect("localhost", "root", "test", "phppot_examples");
if (! empty($_FILES)) {
    // Validating SQL file type by extensions
    if (! in_array(strtolower(pathinfo($_FILES["backup_file"]["name"], PATHINFO_EXTENSION)), array(
        "sql"
    ))) {
        $response = array(
            "type" => "error",
            "message" => "Invalid File Type"
        );
    } else {
        if (is_uploaded_file($_FILES["backup_file"]["tmp_name"])) {
            move_uploaded_file($_FILES["backup_file"]["tmp_name"], $_FILES["backup_file"]["name"]);
            $response = restoreMysqlDB($_FILES["backup_file"]["name"], $conn);
        }
    }
}

function restoreMysqlDB($filePath, $conn)
{
    $sql = '';
    $error = '';

    if (file_exists($filePath)) {
        $lines = file($filePath);

        foreach ($lines as $line) {

            // Ignoring comments from the SQL script
            if (substr($line, 0, 2) == '--' || $line == '') {
                continue;
            }

            $sql .= $line;

            if (substr(trim($line), - 1, 1) == ';') {
                $result = mysqli_query($conn, $sql);
                if (! $result) {
                    $error .= mysqli_error($conn) . "\n";
                }
                $sql = '';
            }
        } // end foreach

        if ($error) {
            $response = array(
                "type" => "error",
                "message" => $error
            );
        } else {
            $response = array(
                "type" => "success",
                "message" => "Database Restore Completed Successfully."
            );
        }
    } // end if file exists
    return $response;
}
?>