PHP can send an HTML email with its built-in mail() function or an SMTP library such as PHPMailer. In both cases, the message must be marked as HTML so the recipient’s email client renders the markup instead of displaying it as plain text.
The native function works for simple messages when the server already has a configured mail system. PHPMailer is the better choice when you need SMTP authentication, a plain-text fallback, attachments, or useful error details.
This tutorial starts with a short mail() example. It then builds a practical HTML contact email with PHPMailer and authenticated SMTP.
Quick answer
To send an HTML email with PHP mail(), add the MIME version and HTML content type to the headers. Pass the HTML document as the message body.
<?php

$to = 'recipient@example.com';
$subject = 'Your order has been received';

$message = <<<HTML
<!doctype html>
<html lang="en">
<head>
    <meta charset="UTF-8">
    <title>Order received</title>
</head>
<body>
    <h1>Thank you for your order</h1>
    <p>We have received your order and will send an update soon.</p>
</body>
</html>
HTML;

$headers = [
    'MIME-Version' => '1.0',
    'Content-Type' => 'text/html; charset=UTF-8',
    'From' => 'Example Store <no-reply@example.com>',
    'Reply-To' => 'support@example.com',
];

$mailAccepted = mail($to, $subject, $message, $headers);

if ($mailAccepted) {
    echo 'The server accepted the email for delivery.';
} else {
    echo 'The server could not accept the email.';
}
?>
The Content-Type header tells the email client to render the message as HTML. The charset=UTF-8 value supports common international characters.
A true result does not prove that the message reached the inbox. It only means the server accepted it for delivery. The PHP mail() documentation explains this behavior.
For more detail about the function itself and its server requirements, see the PHPpot guide to the PHP mail() function.
How HTML email differs from a web page
An HTML email is not rendered like a normal web page. Email clients remove or ignore some HTML and CSS for security and compatibility reasons.
Keep the markup simple. Use a clear document structure, inline CSS for important presentation, and tables when the layout must work across older email clients.
Set the email content type
The following header tells the recipient’s email client that the message contains HTML:
Content-Type: text/html; charset=UTF-8A <meta charset="UTF-8"> element inside the HTML is useful, but it does not replace the email header. The MIME content type must also declare the character set.
Use inline CSS for important styles
Some email clients remove embedded style sheets or do not support modern layout features consistently. Place essential presentation rules in each element’s style attribute.
<a
    href="https://example.com/orders/123"
    style="display:inline-block;padding:12px 18px;background:#2563eb;color:#ffffff;text-decoration:none;border-radius:5px;"
>
    View order
</a>
Avoid JavaScript, forms, iframes, and complex interactive elements. Most email clients block or remove them.
Use complete URLs
Relative links such as /orders/123 do not have a website origin inside an email. Use complete HTTPS URLs for links and externally hosted images.
<img
    src="https://example.com/images/logo.png"
    width="160"
    alt="Example Store"
>
A local path such as images/logo.png or /var/www/logo.png will not load in the recipient’s inbox. To package an image inside the message, embed it as a content-ID attachment with a mail library.
Include a plain-text alternative
A complete HTML email should also contain a plain-text version. Mail clients that cannot or do not display HTML can show this alternative. Spam filters may also treat a well-formed multipart message more favorably than an HTML-only message.
Building a multipart message manually with mail() requires MIME boundaries and careful encoding. PHPMailer creates both parts when you set its HTML body and AltBody.
Choose between mail() and PHPMailer
Both options can send HTML, but they solve different problems.
| Requirement | PHP mail() | PHPMailer with SMTP |
|---|---|---|
| No PHP package required | Yes | No |
| Needs a configured local mail system | Usually | No |
| SMTP authentication | No | Yes |
| HTML and plain-text alternatives | Must be built manually | Built-in support |
| Embedded images and attachments | Must be built manually | Built-in support |
| Detailed error information | Limited | Yes |
Use mail() for a simple HTML message when the server already has reliable mail delivery. It is also useful for learning how email headers work.
Use PHPMailer for application email sent through Gmail, Microsoft 365, a transactional email provider, or another authenticated SMTP server. It handles MIME formatting, encryption, address validation, and multipart content.
The rest of this tutorial uses PHPMailer for the complete project. It sends an HTML contact email with a plain-text alternative and keeps SMTP credentials outside the public directory.
Install PHPMailer and create the project
The example requires PHP 8.1 or newer, Composer, the OpenSSL extension, and SMTP credentials from an email provider. A database is not needed.
Create a new project directory and install the current PHPMailer 7 release with Composer:
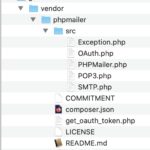
composer require phpmailer/phpmailer:^7.1Composer creates the vendor directory and generates the autoloader used by the project. The package source and release information are available in the official PHPMailer repository.
Use the following project structure:
php-send-html-email/
├── public/
│   ├── assets/
│   │   └── style.css
│   └── index.php
├── src/
│   └── MailService.php
├── templates/
│   └── contact-email.php
├── vendor/
├── config.php
├── composer.json
└── README.md
Only the public directory should be accessible from the web. Keep config.php, the email template, and application classes outside it.
The project follows a small, practical flow:
- The visitor submits the contact form.
index.phpvalidates the submitted values.MailService.phpconfigures PHPMailer and SMTP.- The service renders the HTML template.
- PHPMailer sends the HTML and plain-text versions as one message.
Configure the SMTP connection
Create config.php in the project root. Add the SMTP settings supplied by your email provider.
<?php

declare(strict_types=1);

return [
    'smtp' => [
        'host' => 'smtp.example.com',
        'port' => 587,
        'username' => 'smtp-user@example.com',
        'password' => 'replace-with-smtp-password',
        'encryption' => 'tls',
    ],
    'sender' => [
        'email' => 'no-reply@example.com',
        'name' => 'Example Website',
    ],
    'recipient' => [
        'email' => 'owner@example.com',
        'name' => 'Website Owner',
    ],
];
Use tls with port 587 for STARTTLS, or ssl with port 465 for implicit TLS. Use the exact combination documented by your provider.
The sender should belong to the domain or mailbox authenticated by the SMTP account. A mismatched From address can cause the provider to reject the message or replace the sender.
The recipient is stored in the configuration instead of coming from the form. This prevents visitors from using the application to send email to arbitrary addresses.
Keep SMTP credentials private
Do not commit config.php to a public repository. Add it to .gitignore:
/config.php
/vendor/
For deployment, use environment variables or a secrets manager when the hosting platform provides them. The configuration file keeps this tutorial easy to run, but it must remain outside the public web directory.
Create the HTML email template
Create templates/contact-email.php. This file contains the email markup and receives the validated name, email address, and message from the mail service.
<?php

declare(strict_types=1);

/** @var string $name */
/** @var string $email */
/** @var string $message */

$escape = static fn (string $value): string => htmlspecialchars(
    $value,
    ENT_QUOTES | ENT_SUBSTITUTE,
    'UTF-8'
);
?>
<!doctype html>
<html lang="en">
<head>
    <meta charset="utf-8">
    <title>New website message</title>
</head>
<body style="margin:0;background:#f3f4f6;font-family:Arial,sans-serif;color:#1f2937;">
    <table
        role="presentation"
        width="100%"
        cellspacing="0"
        cellpadding="0"
        border="0"
    >
        <tr>
            <td align="center" style="padding:24px 12px;">
                <table
                    role="presentation"
                    width="100%"
                    cellspacing="0"
                    cellpadding="0"
                    border="0"
                    style="max-width:600px;background:#ffffff;border:1px solid #e5e7eb;border-radius:8px;"
                >
                    <tr>
                        <td style="padding:28px;">
                            <h1 style="margin:0 0 20px;font-size:24px;line-height:1.3;color:#111827;">
                                New website message
                            </h1>

                            <p style="margin:0 0 10px;">
                                <strong>Name:</strong>
                                <?= $escape($name) ?>
                            </p>

                            <p style="margin:0 0 20px;">
                                <strong>Email:</strong>
                                <?= $escape($email) ?>
                            </p>

                            <div style="padding:16px;background:#f9fafb;border-left:4px solid #2563eb;line-height:1.6;">
                                <?= nl2br($escape($message), false) ?>
                            </div>
                        </td>
                    </tr>
                </table>
            </td>
        </tr>
    </table>
</body>
</html>
The template escapes every submitted value with htmlspecialchars(). Without this step, a visitor could place unwanted HTML inside the email.
The nl2br() call runs after escaping. It preserves message line breaks without allowing the visitor to add HTML elements.
The tables use role="presentation" because they control layout rather than represent tabular data. The important styles are inline so they have better support across email clients.
Send the HTML email with PHPMailer
Create src/MailService.php. This class configures SMTP, renders the HTML template, creates the plain-text alternative, and sends both versions in one message.
<?php

declare(strict_types=1);

namespace Phppot\HtmlMail;

use PHPMailer\PHPMailer\Exception;
use PHPMailer\PHPMailer\PHPMailer;

final class MailService
{
    public function __construct(private array $config)
    {
    }

    /**
     * @throws Exception
     */
    public function sendContactMessage(
        string $name,
        string $email,
        string $message
    ): void {
        $mail = new PHPMailer(true);
        $smtp = $this->config['smtp'];

        $mail->isSMTP();
        $mail->Host = $smtp['host'];
        $mail->Port = (int) $smtp['port'];
        $mail->SMTPAuth = true;
        $mail->Username = $smtp['username'];
        $mail->Password = $smtp['password'];

        if ($smtp['encryption'] === 'tls') {
            $mail->SMTPSecure = PHPMailer::ENCRYPTION_STARTTLS;
        } elseif ($smtp['encryption'] === 'ssl') {
            $mail->SMTPSecure = PHPMailer::ENCRYPTION_SMTPS;
        }

        $mail->CharSet = PHPMailer::CHARSET_UTF8;

        $mail->setFrom(
            $this->config['sender']['email'],
            $this->config['sender']['name']
        );

        $mail->addAddress(
            $this->config['recipient']['email'],
            $this->config['recipient']['name']
        );

        $mail->addReplyTo($email, $name);

        $mail->isHTML(true);
        $mail->Subject = 'New website message';
        $mail->Body = $this->renderTemplate(
            $name,
            $email,
            $message
        );
        $mail->AltBody = $this->buildPlainTextBody(
            $name,
            $email,
            $message
        );

        $mail->send();
    }

    private function renderTemplate(
        string $name,
        string $email,
        string $message
    ): string {
        ob_start();

        require dirname(__DIR__) . '/templates/contact-email.php';

        return (string) ob_get_clean();
    }

    private function buildPlainTextBody(
        string $name,
        string $email,
        string $message
    ): string {
        return implode("\r\n", [
            'New website message',
            '',
            'Name: ' . $name,
            'Email: ' . $email,
            '',
            'Message:',
            $message,
        ]);
    }
}
The call to isSMTP() tells PHPMailer to connect to the configured SMTP server instead of using the local PHP mail system.
The website address is used in setFrom(). The visitor’s validated address is added with addReplyTo(). This lets the recipient reply to the visitor without pretending that the message was sent from the visitor’s domain.
The fixed subject avoids placing form input in an email header. The visitor’s name remains available inside the escaped HTML and plain-text bodies.
The Body property contains the HTML version. The AltBody property contains the plain-text fallback. PHPMailer creates the required multipart MIME structure automatically.
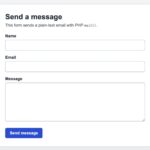
Validate the form and call the mail service
Create public/index.php. This file displays the contact form, validates the submitted values, and calls MailService.
<?php

declare(strict_types=1);

use PHPMailer\PHPMailer\Exception;
use Phppot\HtmlMail\MailService;

session_start();

require dirname(__DIR__) . '/vendor/autoload.php';

$configFile = dirname(__DIR__) . '/config.php';

if (!is_file($configFile)) {
    http_response_code(500);

    exit(
        'Copy config.example.php to config.php '
        . 'and add your SMTP settings.'
    );
}

$config = require $configFile;

if (empty($_SESSION['csrf_token'])) {
    $_SESSION['csrf_token'] = bin2hex(random_bytes(32));
}

$values = [
    'name' => '',
    'email' => '',
    'message' => '',
];

$errors = [];
$success = null;

if ($_SERVER['REQUEST_METHOD'] === 'POST') {
    $values['name'] = trim(
        (string) ($_POST['name'] ?? '')
    );
    $values['email'] = trim(
        (string) ($_POST['email'] ?? '')
    );
    $values['message'] = trim(
        (string) ($_POST['message'] ?? '')
    );

    $token = (string) ($_POST['csrf_token'] ?? '');

    if (!hash_equals($_SESSION['csrf_token'], $token)) {
        $errors[] = 'The form session expired. Refresh the page and try again.';
    }

    if (
        $values['name'] === ''
        || mb_strlen($values['name']) > 80
        || preg_match('/[\r\n]/', $values['name']) === 1
    ) {
        $errors[] = 'Enter a valid name with no more than 80 characters.';
    }

    if (!filter_var($values['email'], FILTER_VALIDATE_EMAIL)) {
        $errors[] = 'Enter a valid email address.';
    }

    if (
        $values['message'] === ''
        || mb_strlen($values['message']) > 3000
    ) {
        $errors[] = 'Enter a message with no more than 3,000 characters.';
    }

    $lastSentAt = (int) ($_SESSION['last_sent_at'] ?? 0);

    if (time() - $lastSentAt < 30) {
        $errors[] = 'Please wait 30 seconds before sending another message.';
    }

    if ($errors === []) {
        try {
            $mailService = new MailService($config);

            $mailService->sendContactMessage(
                $values['name'],
                $values['email'],
                $values['message']
            );

            $_SESSION['last_sent_at'] = time();
            $_SESSION['csrf_token'] = bin2hex(random_bytes(32));

            $values = [
                'name' => '',
                'email' => '',
                'message' => '',
            ];

            $success = 'Your message was sent successfully.';
        } catch (Exception $exception) {
            error_log(
                'HTML email failed: '
                . $exception->getMessage()
            );

            $errors[] = 'The message could not be sent. Please try again later.';
        }
    }
}

function escape(string $value): string
{
    return htmlspecialchars(
        $value,
        ENT_QUOTES | ENT_SUBSTITUTE,
        'UTF-8'
    );
}
?>
<!doctype html>
<html lang="en">
<head>
    <meta charset="utf-8">
    <meta
        name="viewport"
        content="width=device-width, initial-scale=1"
    >
    <title>PHP HTML Email Demo</title>
    <link rel="stylesheet" href="assets/style.css">
</head>
<body>
<main class="card">
    <h1>Send an HTML email</h1>

    <p class="intro">
        Submit the form to send a formatted message through SMTP.
    </p>

    <?php if ($success !== null): ?>
        <div class="notice success" role="status">
            <?= escape($success) ?>
        </div>
    <?php endif; ?>

    <?php if ($errors !== []): ?>
        <div class="notice error" role="alert">
            <strong>Please correct the following:</strong>

            <ul>
                <?php foreach ($errors as $error): ?>
                    <li><?= escape($error) ?></li>
                <?php endforeach; ?>
            </ul>
        </div>
    <?php endif; ?>

    <form method="post" action="">
        <input
            type="hidden"
            name="csrf_token"
            value="<?= escape($_SESSION['csrf_token']) ?>"
        >

        <label for="name">Name</label>
        <input
            id="name"
            name="name"
            type="text"
            maxlength="80"
            autocomplete="name"
            value="<?= escape($values['name']) ?>"
            required
        >

        <label for="email">Email</label>
        <input
            id="email"
            name="email"
            type="email"
            maxlength="254"
            autocomplete="email"
            value="<?= escape($values['email']) ?>"
            required
        >

        <label for="message">Message</label>
        <textarea
            id="message"
            name="message"
            rows="7"
            maxlength="3000"
            required
        ><?= escape($values['message']) ?></textarea>

        <button type="submit">Send email</button>
    </form>
</main>
</body>
</html>
The recipient and sender addresses are never read from $_POST. They remain in the server-side configuration.
The form uses a CSRF token, validates the reply address, limits input lengths, and applies a 30-second session cooldown. Detailed PHPMailer errors are written to the server log instead of being displayed to visitors.
Every submitted value is escaped before it is displayed again in the web page. The email template performs its own escaping because HTML output and email headers require different protections.
Add the form styling and run the project
Create public/assets/style.css. This keeps the form clean and responsive while leaving the email logic as the main focus.
:root {
    color-scheme: light;
    font-family: Arial, sans-serif;
    color: #1f2937;
    background: #f3f4f6;
}

* {
    box-sizing: border-box;
}

body {
    margin: 0;
    padding: 40px 16px;
}

.card {
    width: min(100%, 620px);
    margin: 0 auto;
    padding: 32px;
    border: 1px solid #d1d5db;
    border-radius: 10px;
    background: #ffffff;
    box-shadow: 0 8px 24px rgba(31, 41, 55, 0.08);
}

h1 {
    margin: 0 0 8px;
    font-size: 1.8rem;
}

.intro {
    margin: 0 0 24px;
    color: #4b5563;
}

label {
    display: block;
    margin: 18px 0 6px;
    font-weight: 700;
}

input,
textarea {
    width: 100%;
    padding: 11px 12px;
    border: 1px solid #9ca3af;
    border-radius: 6px;
    font: inherit;
}

input:focus,
textarea:focus {
    border-color: #1d4ed8;
    outline: 3px solid rgba(29, 78, 216, 0.15);
}

button {
    margin-top: 22px;
    padding: 11px 18px;
    border: 0;
    border-radius: 6px;
    background: #1d4ed8;
    color: #ffffff;
    font: inherit;
    font-weight: 700;
    cursor: pointer;
}

button:hover {
    background: #1e40af;
}

.notice {
    margin: 18px 0;
    padding: 12px 14px;
    border-radius: 6px;
}

.notice ul {
    margin: 8px 0 0;
    padding-left: 20px;
}

.success {
    border: 1px solid #86efac;
    background: #f0fdf4;
    color: #166534;
}

.error {
    border: 1px solid #fca5a5;
    background: #fef2f2;
    color: #991b1b;
}

@media (max-width: 520px) {
    body {
        padding: 20px 12px;
    }

    .card {
        padding: 22px;
    }
}
Run the project locally
Open a terminal in the project directory and install the dependencies:
composer installCopy config.example.php to config.php, then add your SMTP settings. Start PHP’s local development server with the public directory as the document root:
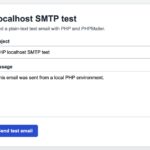
php -S localhost:8000 -t publicOpen http://localhost:8000, complete the form, and submit it. If the SMTP settings are correct, the recipient should receive both HTML and plain-text versions in one email.
HTML contact message sent from PHP with PHPMailer and authenticated SMTP.
Security considerations
An HTML email combines untrusted form data, HTML output, email headers, and SMTP credentials. Each part needs separate protection.
Escape all form data inside the template
Never insert submitted values directly into an HTML email. A visitor could add unwanted links, images, or markup that changes the message.
Escape plain text with htmlspecialchars() before placing it inside HTML:
<?php
$safeMessage = htmlspecialchars(
    $message,
    ENT_QUOTES | ENT_SUBSTITUTE,
    'UTF-8'
);

echo nl2br($safeMessage, false);
?>
If an application intentionally accepts rich HTML, simple escaping is not enough because it removes all markup. Use a trusted HTML sanitizer with a strict allowlist instead. Do not try to secure arbitrary HTML with regular expressions.
Keep form data out of email headers
Line breaks in a subject, sender name, or address can be used for email header injection. The project uses a fixed subject and fixed sender. It also validates the visitor’s email before adding it as Reply-To.
PHPMailer validates addresses and blocks unsafe header values, but the application should still validate input before passing it to the library.
Use a domain-aligned sender
Do not place the visitor’s address in From. Use an address from the domain authenticated by the SMTP account. Place the visitor’s validated address in Reply-To.
This improves SPF and DMARC alignment and reduces the chance that the message will be rejected as forged.
Protect SMTP credentials
Keep the configuration outside the public web directory and version control. Use a separate SMTP credential for the application when the provider supports it.
Do not display SMTP exceptions, usernames, server names, or connection details to visitors. Record detailed errors in a protected server log.
Limit automated submissions
A CSRF token prevents another website from submitting the form through an active visitor session. It does not stop a bot that opens the form directly.
Add server-level rate limiting to a public form. Use CAPTCHA when automated abuse continues. A session cooldown is useful as a first layer, but an attacker can bypass it by starting a new session.
Do not trust the recipient address
Keep the recipient in server-side configuration. If a visitor can choose any destination address, the form can become a tool for sending spam.
Common errors and fixes
PHPMailer reports more detail than the native mail() function, but the visible error is not always the root cause. Check the SMTP settings, provider requirements, and server log together.
| Error or symptom | Likely cause | What to check |
|---|---|---|
Class "PHPMailer\PHPMailer\PHPMailer" not found |
Composer dependencies are missing or the autoloader was not included. | Run composer install and require vendor/autoload.php. |
SMTP connect() failed |
The host, port, encryption setting, firewall, or network connection is incorrect. | Compare the configuration with the provider’s SMTP documentation. Confirm that the hosting service allows outbound SMTP connections. |
SMTP Error: Could not authenticate |
The username, password, authentication method, or account permission is incorrect. | Check the complete SMTP username. Use an application password or OAuth when required by the provider. |
| The email displays raw HTML tags | The message was not marked as HTML. | Call $mail->isHTML(true) before assigning the HTML body. |
| The HTML version works, but the plain-text version is empty | AltBody was not set. |
Add a useful plain-text version instead of repeating raw HTML. |
| Images do not appear | The message uses relative paths, local file paths, or blocked remote images. | Use complete HTTPS URLs or embed images with addEmbeddedImage(). Include meaningful alt text. |
| The layout looks different in Outlook or Gmail | The email client does not support part of the HTML or CSS. | Use simple tables for layout, inline essential styles, and test the message in several clients. |
| PHPMailer reports success, but the message does not arrive | The SMTP server accepted the message, but it was filtered or rejected later. | Check spam, the provider’s activity log, bounce messages, SPF, DKIM, DMARC, and sender reputation. |
Enable SMTP debugging safely
During development, PHPMailer can log its conversation with the SMTP server. Send this output to the server log instead of displaying it in the page.
<?php

use PHPMailer\PHPMailer\SMTP;

$mail->SMTPDebug = SMTP::DEBUG_SERVER;

$mail->Debugoutput = static function (
    string $message,
    int $level
): void {
    error_log('PHPMailer debug level ' . $level . ': ' . $message);
};
Disable SMTP debugging after the connection works. Debug output can contain server details that should not be shown to visitors.
If SMTP works on hosting but not on your development computer, follow the PHPpot guide to send email from localhost with PHPMailer.
Developer FAQ
Can PHP mail() send HTML email?
Yes. Add MIME-Version: 1.0 and Content-Type: text/html; charset=UTF-8 headers, then pass the HTML document as the message body. The server must already have working email delivery.
Why is PHPMailer better for HTML email?
PHPMailer supports authenticated SMTP, multipart messages, attachments, embedded images, UTF-8, and detailed error reporting. It also creates MIME boundaries and encodings without requiring you to build them manually.
Can an HTML email use an external CSS file?
Do not depend on an external style sheet. Many email clients remove linked CSS or block the request. Place important styles inline and keep the design simple.
How do I send an HTML template file with PHPMailer?
Render or read the template into a string, then assign that string to $mail->Body. If the template contains submitted data, escape each value before inserting it into the HTML.
How do I embed an image in the email?
Use addEmbeddedImage() and refer to its content ID in the HTML:
<?php
$mail->addEmbeddedImage(
    dirname(__DIR__) . '/assets/logo.png',
    'company-logo',
    'logo.png'
);

$mail->Body = '<img src="cid:company-logo" alt="Company name">';
?>
Use embedded images only when they add value. They increase the message size. For larger images, a complete HTTPS URL may be more suitable, although some email clients block remote images by default.
Why should an HTML email include AltBody?
AltBody provides a readable plain-text version for clients that do not display HTML. PHPMailer uses it to create a multipart alternative message.
Can PHPMailer send HTML email through Gmail?
Yes, if the account and application use a Google-supported authentication method. Depending on the account, this may require an application password or OAuth. A normal account password may be rejected.
Should the visitor’s address be used as From?
No. Use an authenticated address from your own domain in From. Put the visitor’s validated address in Reply-To. This supports sender alignment and still allows the recipient to reply directly.
Does a successful send confirm delivery?
No. It confirms that the SMTP server accepted the message. The message can still be filtered, bounced, or rejected during a later delivery step.
How should I test an HTML email?
Send it to accounts on several common email services. Check the desktop, mobile, dark mode, plain-text version, links, images, and spam placement. Also test with remote images disabled.
Download the PHP HTML email project
The downloadable project contains the complete contact form, PHPMailer service, responsive HTML email template, plain-text fallback, SMTP configuration example, CSS, Composer file, and setup instructions.
After extracting the project, run composer install. Copy config.example.php to config.php and add the SMTP settings supplied by your email provider.