Twitter-like social media websites provide the photo upload feature with a list of action bar items related to the upload process. These actions may be Insert New Photo, Update Photo, Cancel Upload or Remove Photo.
On clicking the upload photo link, these options are shown to the user in a floating HTML element by using AJAX server-side functionality added to them.
This tutorial will show an example of uploading a user’s profile photo with the upload menu options. These options are shown in the split buttons used to handle the actions related to the upload process.
These are, Upload, Remove, and Cancel. I use jQuery to show the floating action bars to the user. In a previous tutorial, we have seen an example of uploading images using jQuery AJAX without the upload option menu.

HTML Code for Profile Image Upload with Floating Menu
The following HTML code shows the image upload form and the floating menu options related to the user’s profile image upload. On clicking the photo icon in the middle of the image preview, the floating upload action menu is displayed to the user using jQuery. Refer to this earlier article for PHP AJAX image upload.
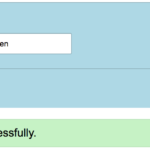
It shows the Upload, ‘Remove,’ and Cancel options. After selecting the image to be uploaded, the submit button calls the jQuery AJAX to execute the image upload script.
<div id="body-overlay"><div><img src="loading.gif" width="64px" height="64px"/></div></div>
<div class="bgColor">
	<form id="uploadForm" action="upload.php" method="post">
		 <div id="targetOuter">
			<div id="targetLayer"><?php if (file_exists("images/profile.jpg")){?><img src="images/profile.jpg" width="200px" height="200px" class="upload-preview" /><?php }?></div>
			<img src="photo.png"  class="icon-choose-image"/>
			<div class="icon-choose-image" onClick="showUploadOption()"></div>
			<div id="profile-upload-option">
				<div class="profile-upload-option-list"><input name="userImage" id="userImage" type="file" class="inputFile" onChange="showPreview(this);"></input><span>Upload</span></div>
				<div class="profile-upload-option-list" onClick="removeProfilePhoto();">Remove</div>
				<div class="profile-upload-option-list" onClick="hideUploadOption();">Cancel</div>
			</div>
		</div>
		<div>
		<input type="submit" value="Upload Photo" class="btnSubmit" onClick="hideUploadOption();"/>
		</div>
	</form>
</div>
jQuery and AJAX Code to Display Action Menu and Process Upload
The following jQuery script shows the floating action menu on clicking the photo icon. The Upload action menu bar selects the profile image and sees the preview before upload.
The Remove action deletes the existing image, and the Cancel option cancels the upload attempt and hides the floating action menu.
<script type="text/javascript">
	function showPreview(objFileInput) {
		hideUploadOption();
		if (objFileInput.files[0]) {
			var fileReader = new FileReader();
			fileReader.onload = function (e) {
				$("#targetLayer").html('<img src="'+e.target.result+'" width="200px" height="200px" class="upload-preview" />');
				$("#targetLayer").css('opacity','0.7');
				$(".icon-choose-image").css('opacity','0.5');
			}
			fileReader.readAsDataURL(objFileInput.files[0]);
		}
	}
	function showUploadOption(){
		$("#profile-upload-option").css('display','block');
	}

	function hideUploadOption(){
		$("#profile-upload-option").css('display','none');
	}

	function removeProfilePhoto(){
		hideUploadOption();
		$("#userImage").val('');
		$.ajax({
			url: "remove.php",
			type: "POST",
			data:  new FormData(this),
			beforeSend: function(){$("#body-overlay").show();},
			contentType: false,
			processData:false,
			success: function(data)
			{
			$("#targetLayer").html('');
			setInterval(function() {$("#body-overlay").hide(); },500);
			},
			error: function()
			{
			}
		});
	}
	$(document).ready(function (e) {
		$("#uploadForm").on('submit',(function(e) {
			e.preventDefault();
			$.ajax({
				url: "upload.php",
				type: "POST",
				data:  new FormData(this),
				beforeSend: function(){$("#body-overlay").show();},
				contentType: false,
				processData:false,
				success: function(data)
				{
				$("#targetLayer").css('opacity','1');
				setInterval(function() {$("#body-overlay").hide(); },500);
				},
				error: function()
				{
				}
		   });
		}));
	});
	</script>