Google Analytics provides excellent free statistics to the users who want to track their application traffic. It offers feature-packed tracking service which almost has no competitors.
There are various aspects of tracking the application traffic. For example, it gives traffic statistics based on the page URLs, user’s location, network, time and more. Using these abundant data we can get the heartbeat of our website to take it forward towards the higher altitude of growth.
Google analytics setup can be easily done for any website. In this post, we are going to see the steps required for creating Google analytics set up on a WordPress website.
In a previous tutorial, we have seen how to insert Google Ads in a WordPress page. We need to request Google to generate analytics Tracking Code by login to the Google Analytics using our Google account.
After successful login, we can get the Tracking Code by navigating through the analytics menu Admin -> Property -> Tracking Info. Let us have a brief view of getting the Google Analytics Tracking Code.
Getting Tracking Code from Google Analytics
There are 3 simple steps required to get the Google Analytics Tracking code.
Step1: Login and Sign up to start with Google Analytics
Login to the Google Analytics using your Google account. After successful login, it will redirect the user to the page to sign up to start with it. The screenshot shows this page below.

Step2: Create a new account by adding your application detail
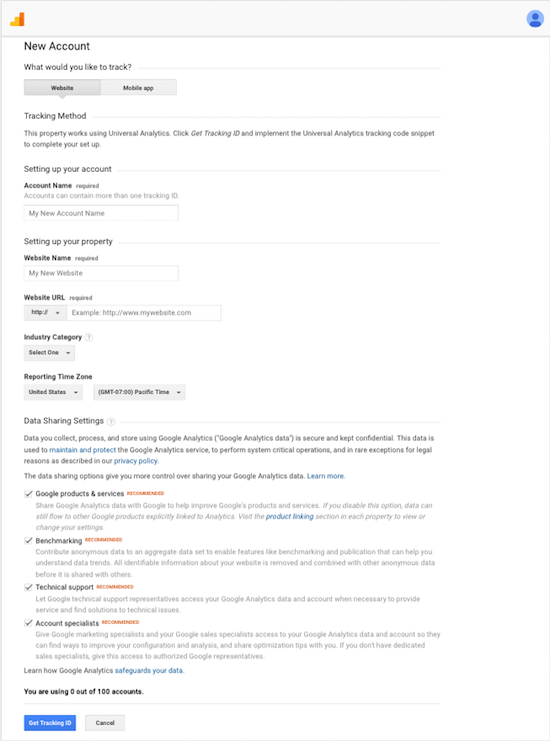
Create a new account for your application by adding some details about your application. In this step, you need to choose the type of your application to specify whether it is Website or Mobile app.
Look at this form to see more data that the user need to enter while setting up an account to track your application.

Step3 – Get Tracking Code for your application
After entering the account information click the Get Tracking ID to go to the Tracking Info page. In this page, it will show the tracking id, tracking code and more information.
![]()
Add Tracking Code in WordPress Site Head
Copy the tracking code generated in the previous step and paste it into the head container of your WordPress site markup. Open header.php from your theme files and paste the tracking code before </head>.
We can add the tracking code via functions.php by using wp_head action hook.
<?php add_action('wp_head', 'add_google_analytics_tracking_code');
function add_google_analytics_tracking_code() {
//Paste your analytics tracking code here
}
?>
By adding google analytics tracking code via the theme files, it will be a problem when we want to change the theme. If you want to add the tracking code without modifying the theme file, you can use the Google analytics plugins available on the market.
There are many such plugins available like Google Analytics+, Google Analytics Dashboard for WordPress, GA Google Analytics. Some of these plugins integrate Google Analytics in WordPress to see tracking from the WordPress admin dashboard.
