Implementing WordPress two-factor authentication (2FA) is a simple work than you imagine. You can improve the security of your website by adding WordPress two-factor authentication. If you are worried about brute-force attacks and hacking, then you should instantly go for 2FA.
The essential step in protecting your WordPress setup is adding a two-factor authentication system. If the bad guys have got hold of your password, yes it is possible. A study says that, a staggering 73% of the Internet users have the habit of using the same password across the sites. In a situation, when your password is compromised, the last line of defense is two-factor authentication.
It is important to have two-factor authentication enabled in banking, shopping, email and any system that you feel is critical.
In this tutorial, we are going to see how to enable WordPress two-factor authentication feature for the blog admin login, using the Google Authenticator and miniOrange plugin.
There are various plugins available to set up two-factor authentication in a WordPress blog. For example, Duo, Rublon Two Factor Authentication plugin are popular choice. In this article, I will guide you through the step by step procedure to configure WordPress tw0-factor authentication by installing the Google Authenticator plugin (by miniOrange).
The two-factor authentication adds an additional layer of security while logging into the system. When the WordPress users enter the username and the password, the WordPress two-factor authentication code is generated dynamically and sent to the user via SMS or email or App notification as per the configuration.
In addition to the username and password, the users will be asked to enter the two-factor code to successfully login to the system.
The Google Authenticator plugin is one of the best plugins for making two-factor authentication. It has many features for implementing the two-factor authentication system. It supports both Google Authenticator app and miniOrange Authenticator app and more.
MiniOrange and Google Authenticator Plugin for WordPress 2FA
MiniOrange provides the free plugin for one user forever. The second layer of the two-factor authentication can be done in variety of ways. In general, the authentication methods available are Google / Authy / LastPass Authenticator, QR Code, Push Notification, Soft Token and security questions (KBA).
This plugin also has premium features for advance usage like multi-site support, language translation support etc. This needs to be purchased for more than one user usage.
Google Authenticator enables you to implement two factor authentication. It generates verification code on a phone and helps in doing the second step of the verification during the login process. WordPress two-factor authentication process also can also use Google Authenticator in implementing the second step.
Install Google Authenticator – WordPress Two-Factor Authentication Plugin
Download miniOrange plugin from the WordPress plugin repository. Unzip the plugin folder and put it into the wp-content/plugins directory of your site. By doing this, the miniOrange plugin will be listed under the installed plugins.
You can also install plugins by searching with the WordPress admin filter. If you are a beginner to the WordPress development, read my WordPress plugin installation guide.
After installing the miniOrange two-factor authentication plugin, activate it by the option provided in the WordPress admin panel. Then, a new menu item miniOrange 2-Factor will be added to the WordPress admin menu. Click that menu and follow the steps listed below.
- Register with miniOrange.
- Choose the two-factor authentication method.
- Test your authentication method.
- Configure roles to which you prefer this two-factor authentication is applicable. (Optional)
After completing the above set of configurations, the WordPress two-factor authentication will be enabled for your blog or website. In the following section, we will see how to perform with the above given steps.
Register with miniOrange
The first step of this configuration process is to register with the miniOrange application. If you are not having an account then the registration wizard will be shown to the user. The registration is very simple and easy. The wizard will require the email and password field from you to register with.
On successful registration, the page will show the options to select any one of the two-factor authentication methods listed on the plugin settings flow. In this next section, we will see the methods provided by the miniOrange plugin to add an additional level of security with the two-factor authentication.
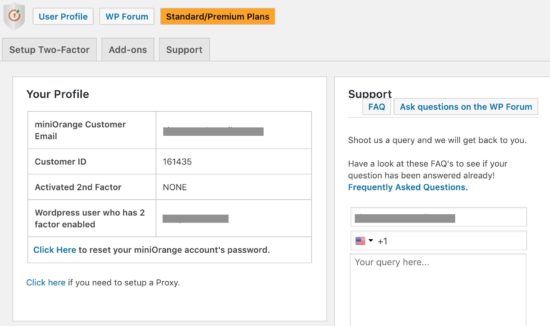
Once registered with the miniOrange the account details will be populated in the user profile page as shown in the following screenshot.
Choose WordPress Two-Factor Authentication Method
The miniOrange plugin supports numerous methods for adding more security to the login with the WordPress two-factor authentication feature. These methods are available depends on the basic(free), standard, premium version of this plugin. The plugin settings page contains the option to upgrade to the higher version to get additional features of this plugin.
Below list shows the two-factor authentication methods supported by this plugin.
- One time passcodes (OTP) over SMS
- OTP over Email
- OTP over SMS and Email
- Out of Band SMS
- Out of Band Email
- Soft Token
- Push Notification
- USB based Hardware token
- Security Questions
- Mobile Authentication
- Voice Authentication (Biometrics)
- Phone Verification
- Device Identification
- Location
- Time of Access
- User Behavior
In the following sections, we are going to discuss the authentication methods allowed with the free version of this plugin. Below screenshot shows the plugin settings page to choose any one of these auth methods.
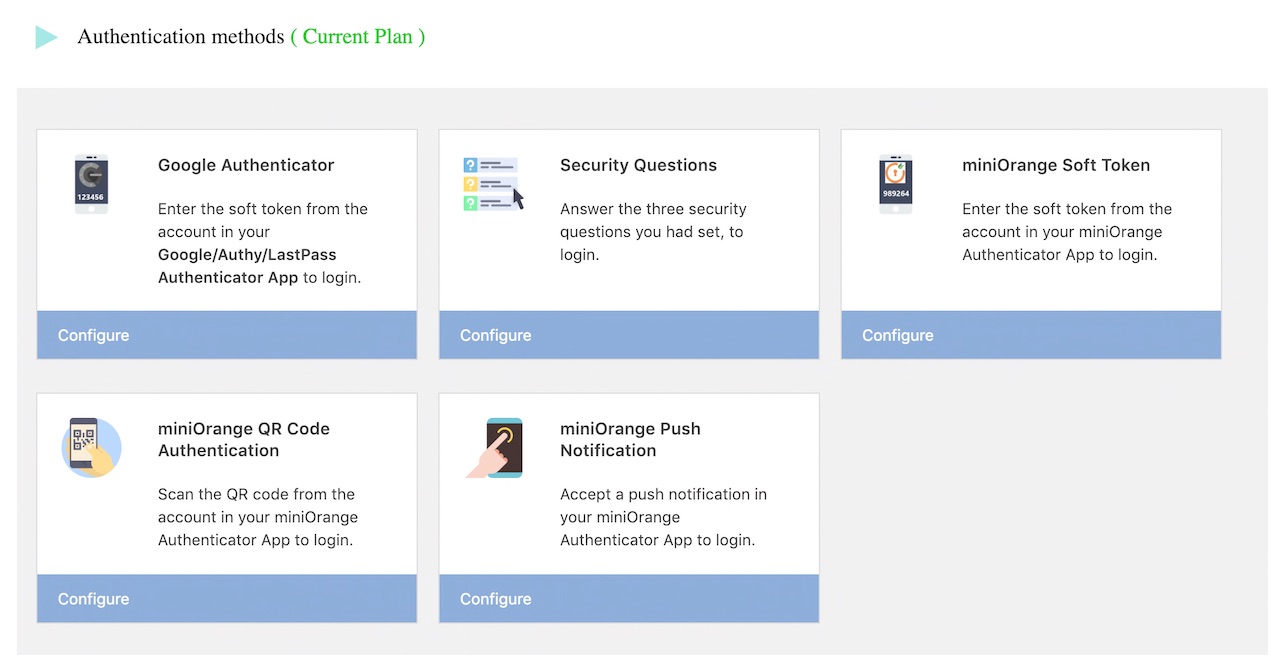
Set with Google Authenticator
To configure this authentication method, you need to set up an account using Google/Authy/Last Pass Authenticator app. Then, this account will be verified with the reference of the verification code.
First, install the Google Authenticator app on your phone. This app is available for both Android and iOS. After installation, follow the below steps to set up an account.
- Choose the account name to be configured with the Authenticator app.
- Open the Authenticator app and Set up account and Scan QR Code.
- Enter OTP to verify the account.
Once configured the above settings, a soft token will be created in the authenticator app account. This token will be used as a second factor of the WordPress two-factor authentication.
If you are using this step, then you have to always carry you mobile phone in which you have installed this APP. Since the verification code will be generated using the APP and you will need it to login to your WordPress site. If you feel that it is a handy cap and not in a position to always carry the phone with you, then you can choose the following option.
Set with Security Questions
This is another method which I have chosen for implementing two-factor authentication in my WordPress demo site. This method will let you configure 3 security question-answer pairs.
By choosing this method, these questions will be prompted to the user or admin when they attempting to log in to the WordPress site. This will surely tighten the WordPress login process and make it be secured.
Once the security questions are selected and configured, then it could be used as a backup code at the time of unfortunate scenarios. For example, the device mapped with the two-factor login authentication is lost, then the security questions could be used to revoke the account access.
Important thing is that you should remember the security question and answer you are using. Also more important is that, do not make it very predictable and do not use the same set of question and answers everywhere as a habit.
If you have a problem in remembering the security questions and answers, use the pattern mapping technique to remember them. Create a patter of answers that relates to the site in a unique way and then it will be easier to remember. Same like passwords, you should not write it on a paper or a diary.
The following screenshot shows the plugin interface used to configure the security questions. Two of the three questions are selectable whereas the last question is a custom fillable field.

Set with miniOrange Soft Token
This plugin supports many authenticator apps and also the miniOrange authenticator app. A straight-forward, simple two-step process is enough to set up WordPress two-factor authentication with this method.
- Download and install miniOrange authenticator app.
- Scan the QR code from the plugin settings page by using this app.
After these set of configurations, the soft taken will be generated by the authenticator app. This token will be used on the second layer of the secured authentication.
Set with QR Code Authentication
The configuration steps are very similar to that of the Soft Token authentication method which we have seen in the last section. After configuring with this type of authentication method, the second level authentication will prompt you to scan the QR code from the account in your authenticator app.
Set miniOrange Push Notification
By setting with the Push Notification method, the login authentication will send the notification to the authenticator app. The user has to Accept the notification to proceed further with the login process.
This method and the last two authentication methods require the miniOrange authenticator app to be installed on your mobile device. Like the other authenticator app the miniOrange app also available for both Android and the iOS devices.
Test Authentication Method
After setting up the authentication method the selected method will be populated in the Two Factor configuration page. For this tutorial, I have setup two-factor authentication in my WordPress demo site. I have used the security questions authentication method.
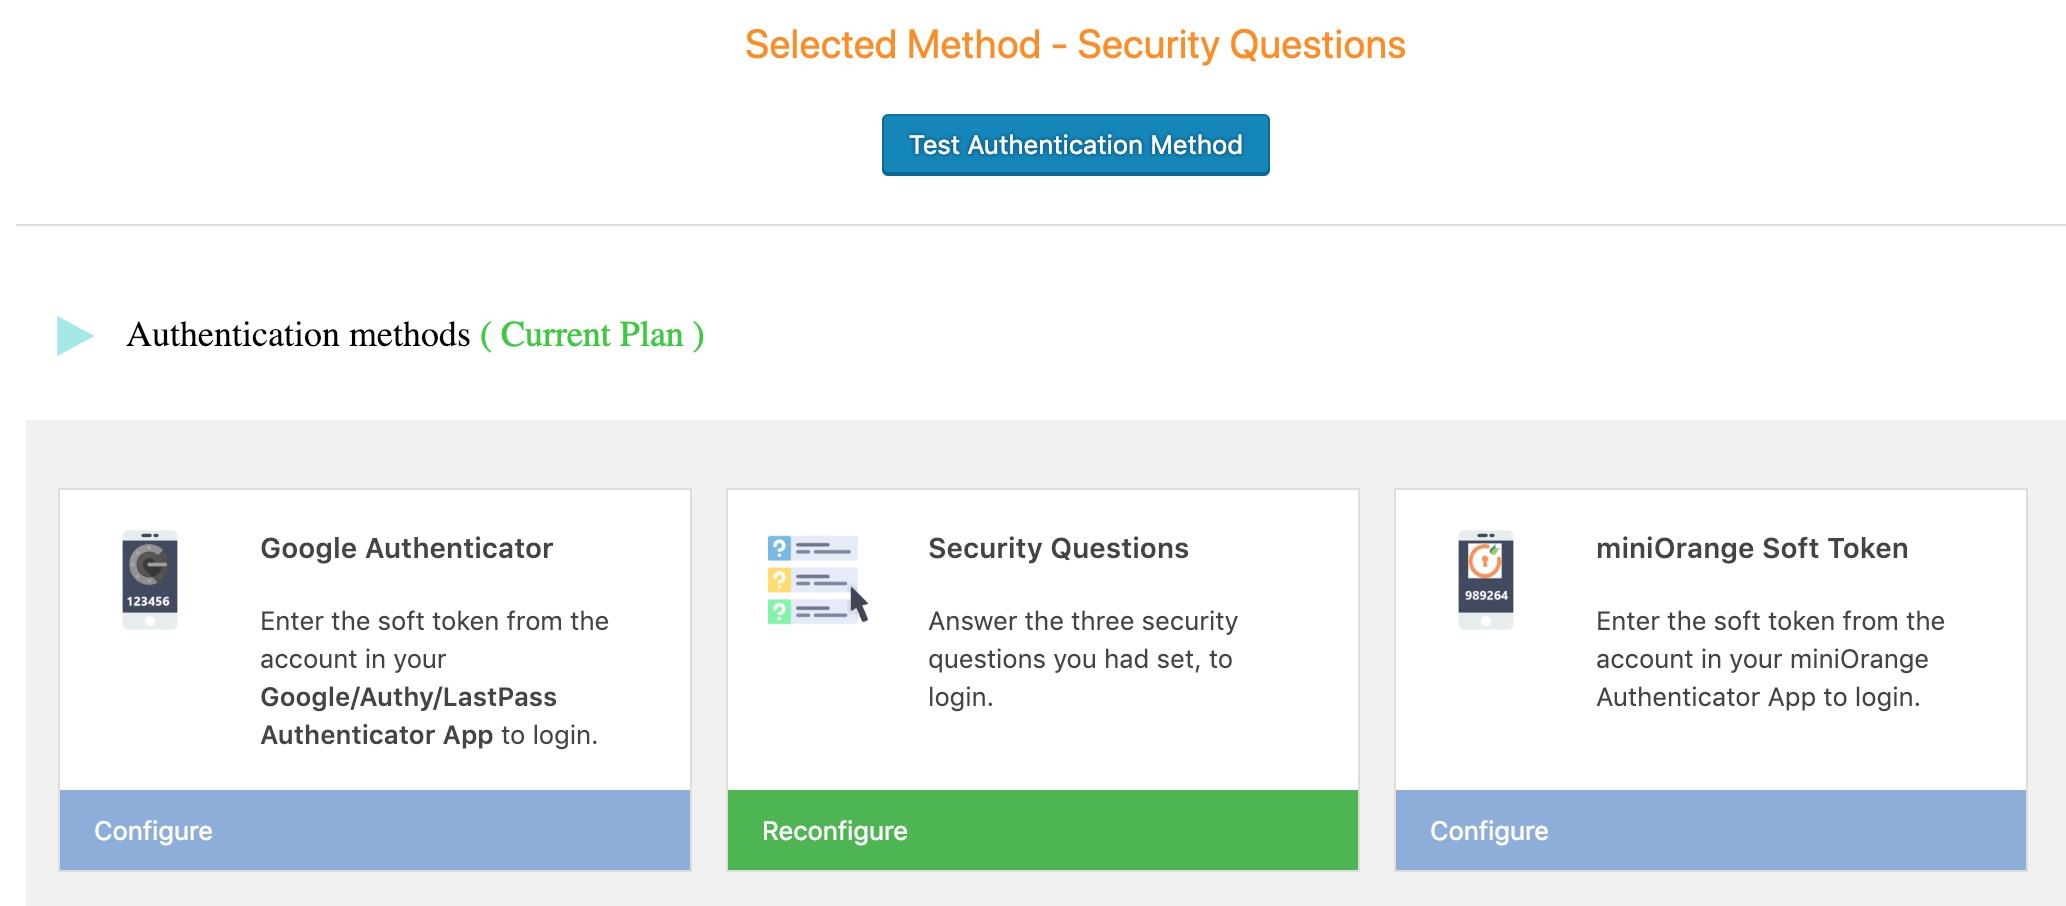
By clicking the Test Authentication Method button the page will be redirected to the form to test your selected authentication method. Once everything is working perfectly as you have expected then you have done with the two-factor authentication setup. From the next login onwards your WordPress site login will contain an additional level of authentication based on the method configured with the authenticator plugin.
Login Interface with WordPress Two-Factor Authentication
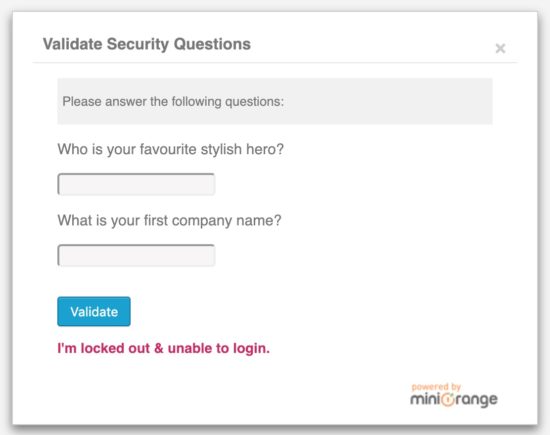
After configuring the WordPress two-factor authentication plugin and testing with the trial option as it is provided by the plugin interface, then this is the time to see how it is implemented in our WordPress site. Once submitting the login username and password, the user will be redirected to a page which will prompt the user to come across with the additional level of authentication.
As I have selected the security questions option, the second level of authentication page will randomly show any two of the selected security questions. The below screenshot shows the second level authentication form with the random security questions. By entering valid answers these questions will make the user get into the WordPress dashboard.
Conclusion
Everybody knows the URL of the login page of your WordPress site unless you have changed the default setting. At a first place it is easier to identify that you are using a WordPress site and there are numerous signatures a WordPress website leaves for that. Same way, it is easier to get the WordPress author URLs and subsequently admin usernames. All there is left with is the password.
If you have the habit of reusing the password across the sites or a small length passwords, then it is equivalent to having none. All these are not rare and many people do not give much importance in securing the authentication. In such a scenario, it is best to add that second layer of security and enable the WordPress two-factor authentication. As I have described in the tutorial, it is easier to implement and can be done using WordPress plugins that are available for free. I recommend you to read through this article and try your hand on implementing it and it is highly worth it.