In this tutorial, we are going to see how to create a multi-step or wizard form in WordPress. There are various ways to create a multi-step form.
This tutorial provides two methods to achieve this. Those are,
- Create a multi-step form using the WordPress plugin.
- Add a custom solution for multi-step form via functions.php
The specialty of the custom example is that it allows enabling/disabling the wizard view. The function.php has the hook to enable or disable the wizard look. By commenting on the hook, it will show a long form in a single step without any wizard.
In a previous tutorial, we have seen how to create a wizard form in PHP.

Method 1: Create a multi-step form using the WordPress plugin
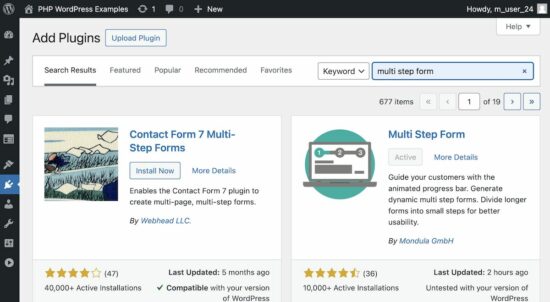
This article uses the Multi Step Form plugin for implementing method 1. Download this plugin from the WordPress plugin repository and add it to your blog directory. See how to install a plugin into WordPress for the guidelines.
Steps to configure and build a multi-step form
- Install the plugin to have the “Multi-Step Form” in the WordPress menu.
- Navigate to “Multi-Step Form”->Settings to set email formats, form styling, and more.
- Build a form with multiple steps and sections.
- Create a Shortcode for the form.
- Create a form page and add the Shortcode to the page content.
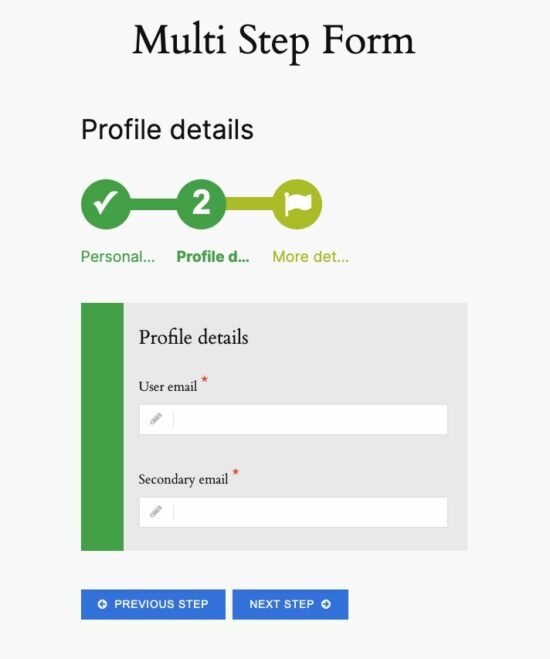
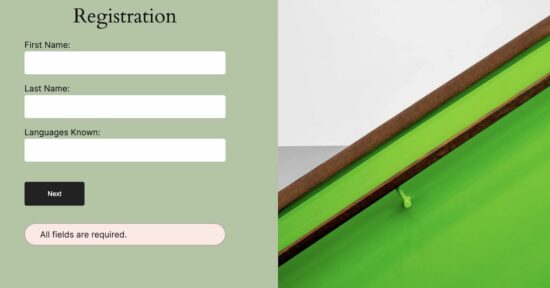
This method will output a multi-step form as shown in the below screenshot.
Step 1: Install the plugin to have the “Multi-Step Form” in the WordPress menu
Download this plugin from the WordPress repository or by the WordPress admin interface.
The below screenshot shows the Multi Step Form plugin in the filtered result.
Install and activate the plugin to have a new menu Multi Step Form in the left menu. This menu provides features to create and manage forms. It allows configuring form styles and other properties.
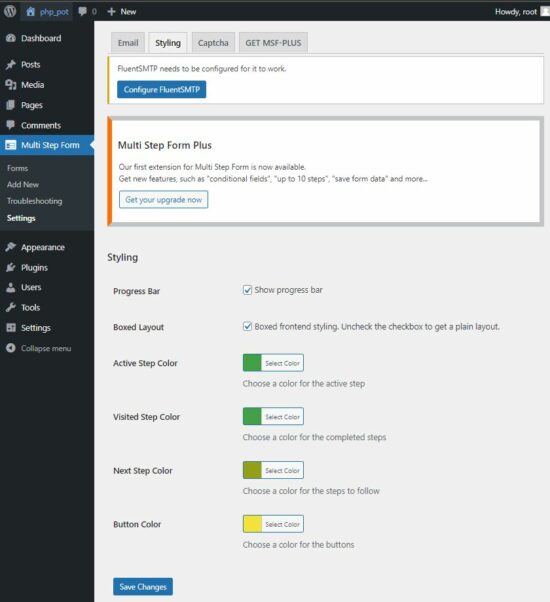
Step 2: Navigate to “Multi-Step Form”->Settings to set email formats, form styling and more
Navigate to the Multi-Step Form plugin pages to set the email formats.
The Styling feature allows you to customize the multi-step form layout, colors, and more UI settings.
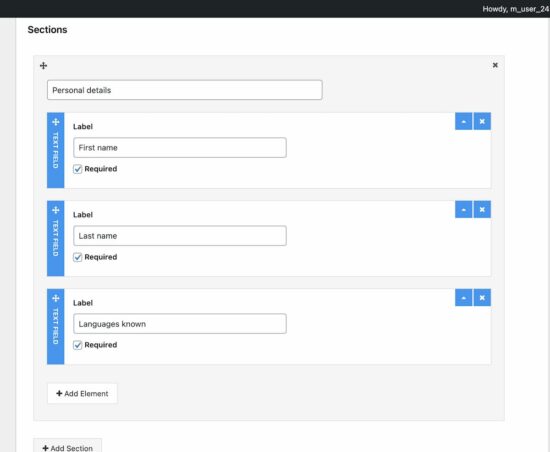
Step 3: Build a form with multiple steps and sections
This is the prime step to build a form via interface. This plugin provides features to segregate forms into subforms. It allows splitting each subform into sections.
Each subform of the wizard should at least contain one section and the section heading is mandatory.
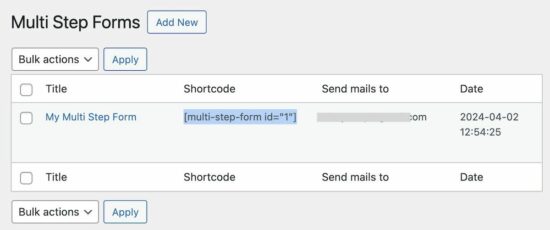
Step 4: Create a Shortcode for the form
Once the form is built the list page shows the created form with its WordPress shortcode.
The below screenshot highlights the shortcode created for the multi-step form instance.
This code can be added to a page’s content in the editor. Otherwise, we can print the form HMTL via the WordPress function do_shortcode() in the theme files.
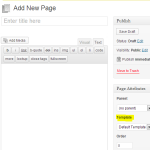
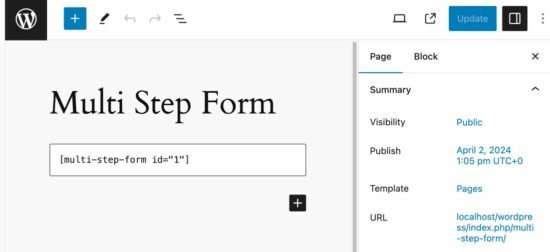
Step 5: Create a form page and add the Shortcode to the page content
Method 2: Add a custom solution for multi-step form via functions.php
This is a custom solution that will be very simple. I always prefer custom solutions instead of going with plugins or any third-party libraries.
This solution will be easy to understand, and implement. It is also easy to maintain if you add this to your WordPress application.
Steps to create a WordPress multi-step form with custom code
- Add a new WordPress page to contain multi-step form HTML.
- Create JavaScript code for the ‘previous’ and ‘next’ navigation.
- Create a jQuery form validation script.
- Add wizard form styles
- Enqueue creates CSS and JS assets via functions.php.
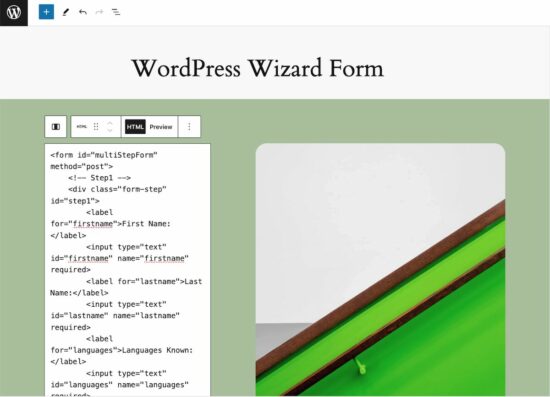
Step 1: Add a new WordPress page to contain a multi-step form HTML
Design a form in an HTML editor and paste the HTML into the WordPress page content. The below image shows the WordPress custom HTML block with the form markup.
This example has a simple registration form in reasonable length.
<h2 class="form-heading">Registration</h2>
<form id="multi-step-form" method="post" onSubmit="submitForm(event)">
    <!-- Personal Information -->
    <div class="form-step" id="step1">
        <label for="firstname">First Name:</label>
        <input type="text" id="firstname" name="firstname" class="required">
        <label for="lastname">Last Name:</label>
        <input type="text" id="lastname" name="lastname" class="required">
        <label for="languages">Languages Known:</label>
        <input type="text" id="languages" name="languages" class="required">
    </div>
    <!-- More Details -->
    <div class="form-step" id="step2">
        <label for="age">Age:</label>
        <input type="number" id="age" name="age" class="required">
        <label for="gender">Gender:</label>
        <select id="gender" name="gender" class="required">
            <option value="male">Male</option>
            <option value="female">Female</option>
            <option value="others">Others</option>
        </select>
    </div>
    <!-- Confirmation & Submission -->
    <div class="form-step" id="step3">
        <label for="how_know">How did you hear about us?</label>
        <select id="how_know" name="how_know" class="required">
            <option value="social-media">Social Media</option>
            <option value="articles">Articles</option>
            <option value="google-ads">Google Ads</option>
            <option value="youtube-ads">Youtube Ads</option>
        </select>
        <label for="about_me">About Me:</label>
        <textarea id="about_me" rows="5" name="about_me" class="required"></textarea>
    </div>

    <!-- Navigation buttons -->
    <button type="button" class="wizard-nav-btn" id="prev-btn" onclick="previousStep()"
        style="display: none;">Back</button>
    <button type="button" id="next-btn" class="wizard-nav-btn" onclick="nextStep()" style="display: none;">Next</button>
    <button type="submit" class="wizard-nav-btn" id="submit-btn">Submit</button>
    <div id="js-validation-error"></div>
    <div id="wizard-success"></div>
</form>
Step 2: Create JavaScript code for the ‘previous’ and ‘next’ navigation
This is the core JS of this example that enables the multi-step view of a form.
It has functions for the ‘prev’ and ‘next’ navigation to move back and forth along with the form steps.
When switching to the next step, it validates the current step. If the current step validation returns false it will not allow us to move to the next step.
wizard.js
let currentStep = 1;
let lastStep = jQuery(".form-step").length;
// Show the first step initially
showStep(currentStep);


function showStep(step) {
    currentStep = step;
    jQuery('.form-step').hide();
    jQuery('#step' + step).show();
    updateButtons();
}

function nextStep() {
    if (validateFieldVisible()) {
        showStep(currentStep + 1);
    }
}

function previousStep() {
    showStep(currentStep - 1);
}

function updateButtons() {
    jQuery(".wizard-nav-btn").hide();

    if (currentStep === 1) {
        jQuery("#next-btn").show();
    } else if (currentStep === lastStep) {
        jQuery("#prev-btn").show();
        jQuery("#submit-btn").show();
    } else {
        jQuery("#next-btn").show();
        jQuery("#prev-btn").show();
    }
}
Step 3: Create jQuery form validation script
The on-submit event calls the validation function to validate the visible section fields.
Once the validation returns true, it executes the AJAX script to send an email and insert the form data.
form.js
function submitForm(event) {
    valid = validateFieldVisible();
    if(valid) {
        event.preventDefault();
        jQuery.ajax({
            type: "POST",
            url: '/wordpress/wp-admin/admin-ajax.php?action=wizard_form_action',
            data:  jQuery("#multi-step-form").serialize(),
            async: false,
            success: function() {
                jQuery("#wizard-success").text('Hi, Thank you! We received your message.').show();
            }
        });
    }
    return false;
}

function validateFieldVisible() {
    valid = true;
    jQuery("#js-validation-error").hide();
    jQuery(".required").each(function(){
        if(jQuery(this).closest(".form-step").is(":visible") && !jQuery(this).val()) {
            valid = false;
            jQuery("#js-validation-error").text('All fields are required.').show();
        }
    })
    return valid;
}
Step 4: Add wizard form styles
These are the minimal styles added for the wizard form.
style.css
#multi-step-form {
    max-width: 500px;
    margin: 20px auto;
}


.form-step select {
    width: 100%;
    margin-bottom: 15px;
    border: 1px solid #ccc;
    border-radius: 4px;
}


.form-step textarea {
    width: 100%;
    margin-bottom: 15px;
    border: 1px solid #ccc;
    border-radius: 4px;
    resize: vertical;
}


.form-step label {
    display: block;

}

.form-step input[type="text"],
.form-step input[type="email"],
.form-step select,
.form-step textarea,
#age {
    width: 100%;
    padding: 15px;
    margin-bottom: 15px;
    box-sizing: border-box;
    border-radius: 4px;
    border: 1px;
}


.wizard-nav-btn {
    padding: 15px 45px;
    margin: 25px 20px 15px 0px;
    border-radius: 4px;
    background-color: #222222;
    border: #000 1px solid;
    color: #fff;
    cursor: pointer;
}

#submit-btn {
    background-color: #2196F3;
    border: #1d8ae0 1px solid;
    color: #000;
}

#js-validation-error {
    display: none;
    padding: 8px 30px;
    border-radius: 25px;
    background-color: #ffe7e7;
    border: 1px solid #a79494;
    color: rgb(40, 40, 40);
    margin: 20px 0px;
}

#wizard-success {
    display: none;
    background-color: #e3fff4;
    border: #d0ebe2 1px solid;
    padding: 8px 30px;
    border-radius: 25px;
    color: rgb(40, 40, 40);
}

.form-heading {
    margin: 20px;
    text-align: -webkit-center;
}
Step 5: Enqueue create CSS and JS assets via functions.php
The created JS and CSS assets are enqueued into the WordPress on run time. The below script shows how to enqueue the form validation, wizard scripts.
By uncommenting the WordPress action hook, wizard_form_action it will display all the form fields in one step.
functions.php
...
...

function enqueue_form_assets()
{
	wp_enqueue_style('theme-style', get_stylesheet_uri());
	wp_enqueue_script('custom-script', get_template_directory_uri() . '/form.js', array('jquery'), null, true);
}
add_action('init', 'enqueue_form_assets');


function enqueue_wizard_script()
{
	wp_enqueue_script('wizard-script', get_template_directory_uri() . '/wizard.js', array('jquery'), null, true);
}
add_action('wp_enqueue_scripts', 'enqueue_wizard_script');

add_action("wp_ajax_wizard_form_action", "wizard_form_action");

function wizard_form_action()
{
	if ($_SERVER['REQUEST_METHOD'] == 'POST' && !empty($_POST['firstname']) && !empty($_POST['lastname']) && !empty($_POST['languages']) && isset($_POST['age']) && isset($_POST['gender']) && !empty($_POST['how_know']) && !empty($_POST['about_me'])) {
		insertWizardFormData();

		// Send email with form response
		sendMail();
	}
	exit();
}

function insertWizardFormData() {
	global $wpdb;
	$table_name = 'tbl_wizard_form_response';

	$data = array(
		'firstname' => $_POST['firstname'],
		'lastname' => $_POST['lastname'],
		'languages' => $_POST['languages'],
		'age' => intval($_POST['age']),
		'gender' => $_POST['gender'],
		'how_know' => $_POST['how_know'],
		'about_me' => $_POST['about_me']
	);

	$format = array(
		'%s',
		'%s',
		'%s',
		'%d',
		'%s',
		'%s',
		'%s'
	);

	$wpdb->insert($table_name, $data, $format);
}

function sendMail() {
	$to = 'RECIPIENT_EMAIL_HERE';
	$subject = 'New form submission';
	$message = "New form submission:\n\n" .
		"First Name: {$_POST['firstname']}\n" .
		"Last Name: {$_POST['lastname']}\n" .
		"Languages: {$_POST['languages']}\n" .
		"Age: {$_POST['age']}\n" .
		"Gender: {$_POST['gender']}\n" .
		"How did you hear about us?: {$_POST['how_know']}\n" .
		"About Me: {$_POST['about_me']}\n";

	wp_mail($to, $subject, $message);
}
Database script
The database insert is an optional step. The functions.php file that we have seen above contains the insert function.
This script is to import the required table into the WordPress database to store the submitted form data.
CREATE TABLE `tbl_wizard_form_response` (
  `id` int(11) UNSIGNED NOT NULL,
  `firstname` varchar(255) NOT NULL,
  `lastname` varchar(255) NOT NULL,
  `languages` varchar(255) NOT NULL,
  `age` int(11) NOT NULL,
  `gender` varchar(255) NOT NULL,
  `how_know` varchar(255) NOT NULL,
  `about_me` text NOT NULL,
  `created_at` datetime NOT NULL DEFAULT current_timestamp()
);

--
-- Indexes for dumped tables
--
ALTER TABLE `tbl_wizard_form_response`
  ADD PRIMARY KEY (`id`);

ALTER TABLE `tbl_wizard_form_response`
  MODIFY `id` int(11) UNSIGNED NOT NULL AUTO_INCREMENT;