In this tutorial, we are going to see how to limit login attempts in WordPress. By limiting the number of invalid login attempts, we can protect a site from the brute force attack.
There are no shortages of malicious users online and no doubt we must protect our live site from hacking. So it is vital to take steps to prevent malicious access to safeguard our websites.
There are many WordPress plugins available to limit the invalid login attempts. For example, WP Limit Login Attempts, Cerber Security, Antispam & Malware Scan and lot more. In this article, let’s see how to limit login attempts by using these two methods.
- By using WP Limit Login Attempts plugin
- By adding custom code without using any WordPress plugins
1) By using WP Limit Login Attempts plugin
This plugin limits login attempts and protects our WordPress site. It has a good rating over online and has 40k+ active installation. It includes several features like limit login, CAPTCHA verification and more.
Download the WP Limit Login Attempts plugin from WordPress.org plugin repository and install it in your WordPress website. If you are new to WordPress, you can learn how to install a new plugin into WordPress by using our beginners’ guide.
After installing and activating the WP Limit Login Attempts plugin configure its settings by navigating through the WordPress admin plugin menu. This plugin has options with default settings. Those options are,
- Number of Login attempts
- Lock time in minutes
- Number of Login attempts for captcha
- Checkbox to enable / disable captcha verification
Note: The WP Limit Login Attempts plugin is the limited version of WP Limit Login Attempts Pro. If you want to get access to all feature and support to change the default settings, then you need to be upgraded to the Pro version of this plugin.
As it is configured the invalid login attempts of the malicious users and robots is restricted. This restriction through this plugin will protect our WordPress site from brute force attacks.
2) Add custom code to Limit Login Attempts in WordPress
This section shows how to limit login attempts by using custom code in functions.php. This is the WordPress theme file contains hooks to filter and perform actions over the WordPress entity. Previously, in many WordPress tutorials, we have used the actions and filter hooks in the theme’s functions.php. For example, we used the action hook with the parse_query tag to disable WordPress search.
By executing our own code with a WordPress action hook, it will reduce the load by avoiding plugin usages. As we have already stated in many WordPress articles, it will greatly optimize your WordPress site by loading a limited number of plugins.
Add the below code to your WordPress functions.php. This code contains the WordPress action and filter hook and the corresponding callback function. The callback contains the code to restrict the number of invalid login attempts.
function check_attempted_login( $user, $username, $password ) {
if ( get_transient( 'attempted_login' ) ) {
$datas = get_transient( 'attempted_login' );
if ( $datas['tried'] >= 3 ) {
$until = get_option( '_transient_timeout_' . 'attempted_login' );
$time = time_to_go( $until );
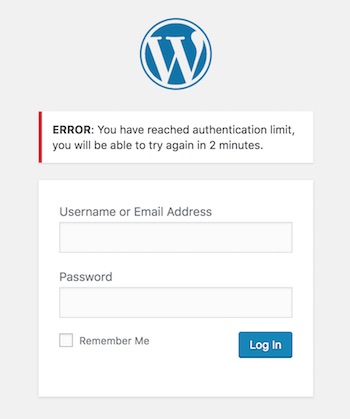
return new WP_Error( 'too_many_tried', sprintf( __( '<strong>ERROR</strong>: You have reached authentication limit, you will be able to try again in %1$s.' ) , $time ) );
}
}
return $user;
}
add_filter( 'authenticate', 'check_attempted_login', 30, 3 );
function login_failed( $username ) {
if ( get_transient( 'attempted_login' ) ) {
$datas = get_transient( 'attempted_login' );
$datas['tried']++;
if ( $datas['tried'] <= 3 )
set_transient( 'attempted_login', $datas , 300 );
} else {
$datas = array(
'tried' => 1
);
set_transient( 'attempted_login', $datas , 300 );
}
}
add_action( 'wp_login_failed', 'login_failed', 10, 1 );
function time_to_go($timestamp)
{
// converting the mysql timestamp to php time
$periods = array(
"second",
"minute",
"hour",
"day",
"week",
"month",
"year"
);
$lengths = array(
"60",
"60",
"24",
"7",
"4.35",
"12"
);
$current_timestamp = time();
$difference = abs($current_timestamp - $timestamp);
for ($i = 0; $difference >= $lengths[$i] && $i < count($lengths) - 1; $i ++) {
$difference /= $lengths[$i];
}
$difference = round($difference);
if (isset($difference)) {
if ($difference != 1)
$periods[$i] .= "s";
$output = "$difference $periods[$i]";
return $output;
}
}
In the above code, we have used the wp_login_failed action tag and authenticate filter tag to hook functions to get and set attempted_login transient. The number of failed attempts is stored temporarily and used to alert the user about it once the limit reached.
authenticate Filter Tag to Hook Function Checking Tried Login Attempts
Using this filter hook the check_attempted_login callback will be invoked. In this function, the WordPress get_transient method is used to get the count of failed login attempts.
If the user tried more than 2 times with the wrong login, then this will return the WordPress error about the failed login limit and the block the user to log in for a specified period of time.
wp_login_failed Action Tag to Hook a method to increment failed login instance
This action hook will invoke the login_failed method when the user login attempt is failed. On every failed attempt, it increments the tried login count. Then the tried login count will be set to the attempted_login transient which will be used later for block the user to log in for the temporary period of time.
In the above code, I have used a time_to_go function calculate the remaining time to let the user log in again after the block. Also, it converts the timestamp into a user-friendly time format. If you want the time_ago function in PHP to display the created date in n (period) ago format, then the linked article will be helpful.
WordPress Login Screenshot with Error Message after Failed Login Attempts
The below screenshot shows display the WordPress login panel with the error message stating that the login is blocked. This will be shown after the contiguous failure login attempts.
Conclusion
Thus, we have seen how to block WordPress user login after continuous failure attempts. By restricting the number of failed login attempts will safeguard our website. By increasing the login block duration we can add more security. This specially protects a WordPress site from the brute force attack which attempts to compromise the authentication process.


how to integrate this code to woocommerce login page
Hi Mehmood,
I don’t think it will be straightforward. This is very specific for WordPress.
It worked like a charm, thank you!
Welcome Jeniffer.
A most excellent article. Thank you so much.
Welcome Bri.