WordPress Multisite Network is a cluster of independent sites created under a single WordPress Installation. Using this WordPress feature, we can have multiple individual sites by installing WordPress only once.
Creating multisite network is easy to implement. This feature is introduced as of the WordPress version 3.0. MultiSite URL can be configured either as a subdomain (Eg: site1.wordpress-example.com) or as a subdirectory (wordpress-example.com/site1). The sub directory is virtual which is not physically present in the installed WordPress repository.
Multisite uses same database, plugins, themes that belong to the WordPress installation. Multiple websites created on a network uses different database tables and media folders.
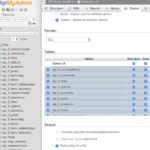
When we add a new site to the WordPress network, the required database tables are created in the same database. The site count will be added to the tables prefix to differentiate the tables used by the multiple sites like <table-prefix><multi-site-count>_<table_name> (Eg: wp3_posts). This post will help you to create and enable a multisite network in your current WordPress installation.
Setup MultiSite Network
Install WordPress and put this line in the wp-config.php which there exists in your WordPress installation root directory.
/* Multisite */
define( 'WP_ALLOW_MULTISITE', true );
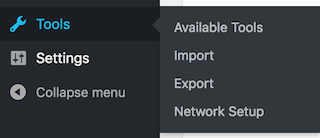
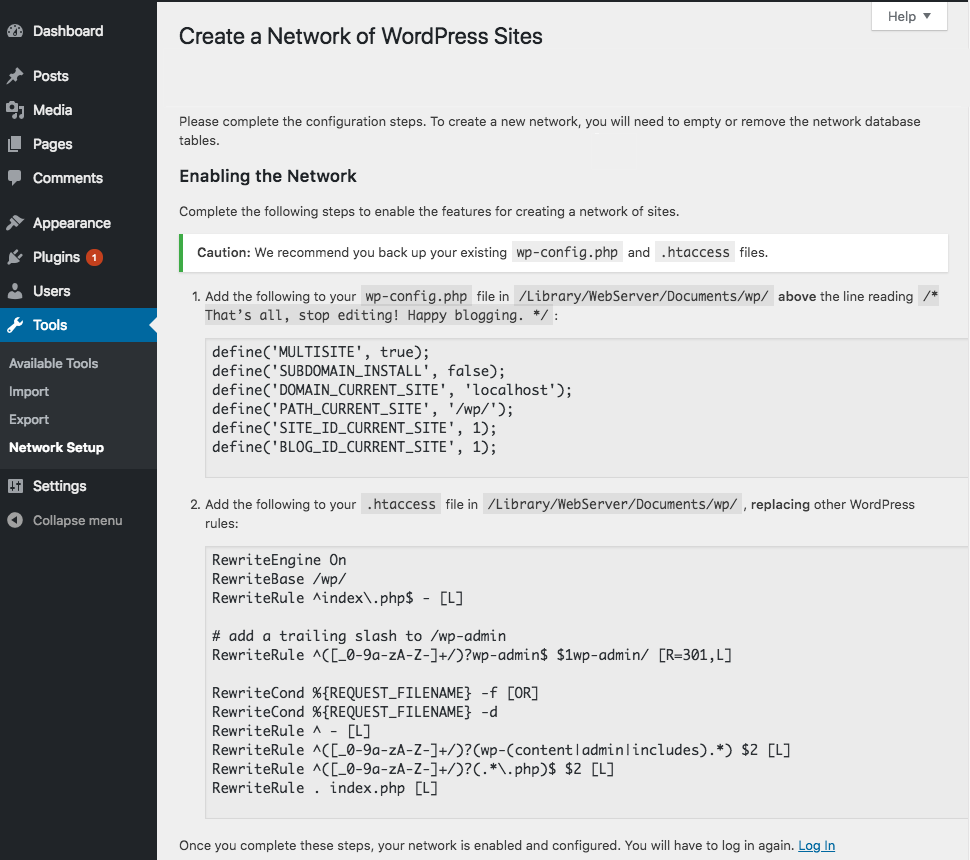
After writing the above code in the configuration file, login to WordPress Admin. Go to Tools menu -> Network Setup to create the multisite network.
After choosing the Network Setup option, we can see the steps required to enable the WordPress multisite network.
If you are upgrading your single WordPress installation to a multisite network, you should take backup for the wp-config.php and the .htaccess file before proceeding with the below configuration.
Managing MultiSite Network Admin
Once you have done with the WordPress multisite network configurations, the admin menu to manage the multi-sites have differed from the single WordPress admin navigation.
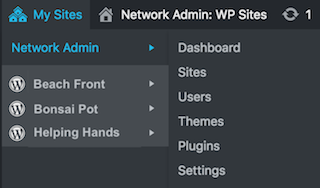
The My Sites menu will be displayed in the admin header. This menu will show a drop-down menu with the Network Admin and the list of sites created in the network.
This screenshot shows the navigation submenus that are allowed for the Network Admin to create and manage plugins, themes and sites.
Creating a New Site on a WordPress Network
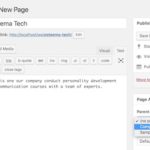
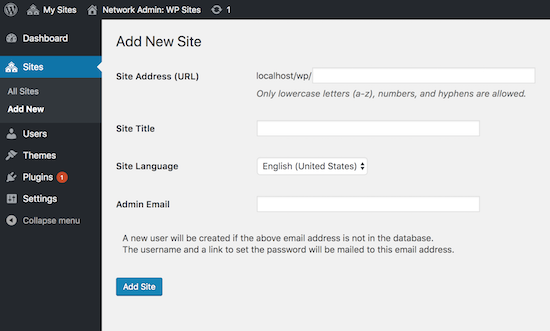
Go to Sites -> Add New to create a new on your WordPress multisite network. The site can be created by the network admin. Users can also create sites if the network admin permits him.
Managing MultiSites
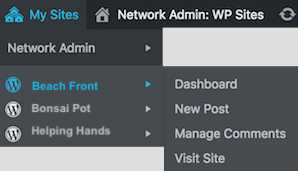
I have created three sites on my WordPress multisite network and I have shown the navigation menu in the below screenshot. This screenshot lists the sites in the network and the submenu to manage each sites content, comment and more.
We cannot install the themes, plugins in site scope. Rather, the plugins, themes can be installed by the network admin and will be shared by all the sites in this network.
The network admin should allow the installed themes by clicking the Network Enable option to view and activate for the sites. Similarly, the admin should allow the list of installed plugins by clicking Network Activate option to activate them for all the sites created in the network.