Why don’t we take a diversion from the contiguous, diehard learning of as usual PHP programming? Let us have some fun by getting started with Raspberry Pi IoT projects in PHP.
I swear this experience will boost your enthusiasm towards programming. In this tutorial, I have given an introduction to IoT, Raspberry Pi essentials, a hello world and a basic LED On / Off with simple code examples.
Using this article you will learn how to setup headless Raspberry Pi by installing OS. I have installed Raspbian OS in Raspberry Pi zero W model.
You can use any model of Raspberry Pi to run through this tutorial. By installing Apache and PHP I have created the PHP environment in the Raspberry Pi and ran through the usual PHP Hello Word program.
To kick-start this IoT projects journey, I have started with a simple PHP program to control LED display by switching on and off.

What is Internet of Things (IoT)?
Internet of Things means cascading devices in a medium and enable connection and data exchange between the device cascade to create the computerized machines which will facilitate people by minimizing manual effort.
IoT connects together devices to create a utility tool to help people in real world. This is kind of a broad definition to give you an idea of what we are dealing with. IoT projects are trending now for a while among the enthusiastic coders around the world.
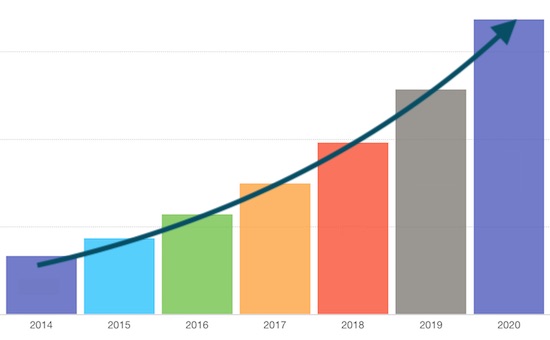
IoT projects year graph tidal shows stronger growth. The statistic says the growth rate is increased 31% year by year. The graph shows the IoT projects growth rate from 2014 and the exponential growth expected up to 2020. So, its time for you to jump into the IoT wave.
What is Raspberry Pi?
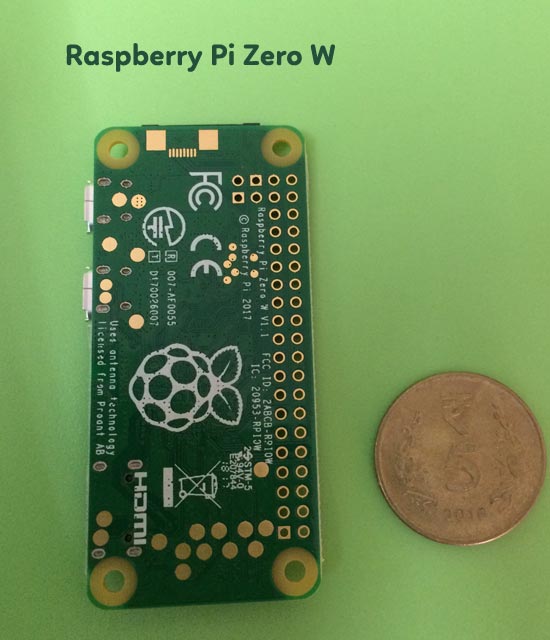
Raspberry Pi is the economical pocket-size computer which you can have with you always and on the go. It is a full-fledged computer to do all jobs as like checking emails, browsing and etc.
It is convenient to do tiny projects with IoT. Raspberry Pi foundation is the UK based educational charity. Its goal is to educate the younger generation about computers and related technologies.
Raspberry Pi Essentials Kit List
I have listed the essential kits required to getting started with the Raspberry Pi.
- Raspberry Pi Zero W (You can use any model of your choice)
- 16 GB memory micro SD card
- Memory card reader
- Mini USB to USB female OTG adapter
- USB hub
- HDMI cable and Mini HDMI to HDMI female adapter
- 5V 2A micro USB power adapter
- 2*20 pin GPIO header
- Jumper wires.
- 5mm LED bulb
- 220 Ohm resistor
- Breadboard

How to Install Raspbian OS in Raspberry Pi?
Raspbian is the recommended OS for the Raspberry Pi. There is a simple installation procedure to setup Raspbian OS in the Raspberry Pi computer.
- Download the Raspian OS bundle and extract it into .iso image format on your Windows or Mac machine.
- Insert the micro SD card in the card reader and insert it into your machine.
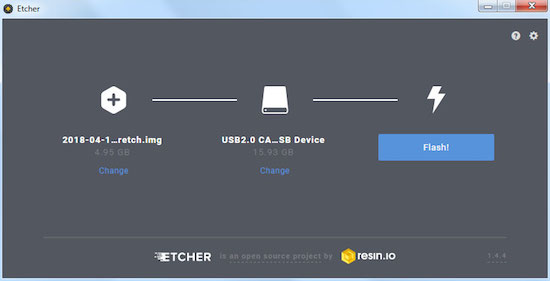
- Download the Etcher tool and flash Raspbian OS image into the micro SD card.
- Connect Raspberry Pi with the basic peripherals like monitor, mouse, keyboard and the power and insert the memory card into Raspberry Pi. Then boot Raspberry Pi with the micro SD card where the Raspbian disc image is loaded.
Note: Use 7-zip for windows and Unarchiver for Mac to extract the Raspbian OS bundle.
How to Install Apache
Before installing the web server, update the available packages by running the below command in the Raspberry Pi terminal window.
sudo apt-get update
Then, run this command to install Apache server in your Raspberry Pi.
sudo apt-get install apache2 -y
Check whether the Apache is installed properly by running http://localhost/ in the browser. It will display the Apache Debian default page on successful installation.
How to Install PHP
After installing the web server, this command is to install PHP to run the PHP files and projects on this server.
sudo apt-get install php libapache2-mod-php -y
Then create PHP files and projects in the server root /var/www/html/ and execute them in the browser.
Raspberry Hello World using PHP
I have created simple PHP Hello World example program in the /var/www/html/ root. I have used the Leafpad editor to create this program. I have created a PHP file as index.php by using the Raspberry terminal command,
sudo leafpad index.php
This file is opened in the Leafpad editor where we can add the PHP script to print Hello World on the browser.
<?php echo "<h1>Hello World!</h1>"; ?>
Raspberry Pi Circuit Diagram for LED On / Off
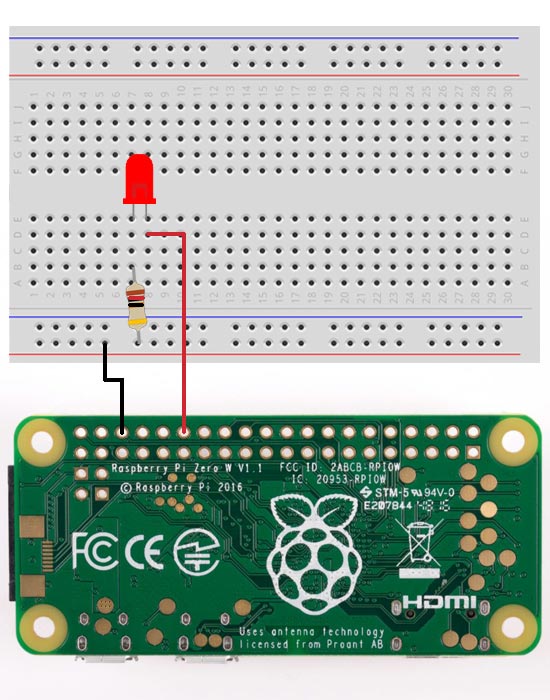
This is the simple attempt to control LED display via PHP program on Raspberry Pi. Before writing the PHP program, create the circuit to between LED and the Raspberry Pi GPIO pins. I have soldered the 2*20 GPIO header with my Raspberry Pi.
Then, I have created the circuit to connect GPIO pin 18 to LED and LED to the GND with a 220 Ohm resistor. See the circuit diagram shown below. See the official documentation to know more about the Raspberry Pi GPIO usage.
Programming LED ON / OFF using PHP on Raspberry Pi
After establishing the circuit, I have created the program to execute commands to the GPIO pins to control LED display. I have used php-gpio library to work with Raspberry Pi’s GPIO pins.
I have installed this library by using composer by running this command (Assuming that you have installed composer on your machine).
composer require ronanguilloux/php-gpio
After installing this library via composer I am handling LED On/Off by setting the ON / OFF flag by using php-gpio library output() function.
<?php
require_once "vendor/autoload.php";
use PhpGpio\Gpio;

$gpio = new GPIO();
$gpio->setup(18, 'out');
while(true) {
    // To Switch ON the LED
    $gpio->output(18, 1);
    sleep(1);
    // To Switch OFF the LED
    $gpio->output(18, 0);
    sleep(1);
}
?>
After setting GPIO pin direction and ON / OFF flag in a PHP script, then run the script in the Raspberry Pi’s terminal window. The command is,
sudo php led_on_off_script.php
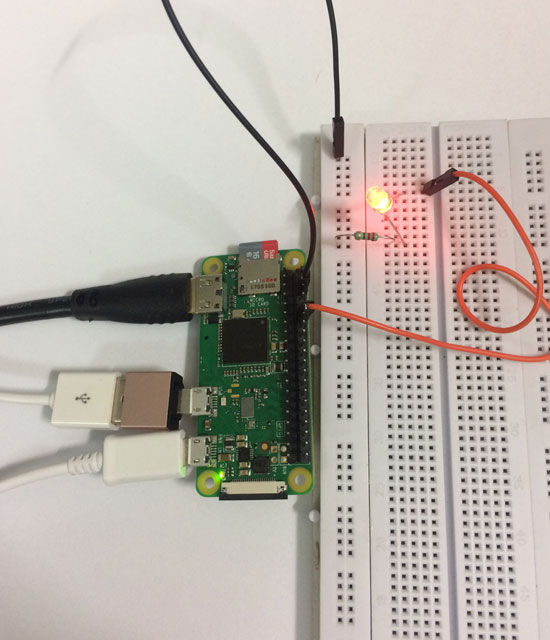
LED On/Off Output via PHP program On Raspberry Pi
This output shows the circuit I have formed by connecting the Raspberry Pi GPIO and the LED with the resistor. In this picture, the LED glows on the basis of the command executed via the PHP program.
Thanks!
Many thanks to Vijay anna for gifting the Raspberry Pi.