Welcome to my jQuery drag and drop tutorial! Drag and drop functionality is a popular feature in web development. It allows users to intuitively interact with elements on a webpage.
In this tutorial, we’ll explore how to implement drag and drop using jQuery. It is a powerful JavaScript library for DOM manipulation and event handling.

Whether you’re building modern websites or enhancing the user experience on your website, understanding drag and drop techniques can greatly enhance usability and interactivity. I will take you through the fundamentals of jQuery draggable and droppable functionalities, and it will help you to create engaging user interfaces.
A complete example of jQuery drag and drop, with full source code, is available at the end of this article.
Understanding the basics of Drag and Drop in jQuery
In this section, we’ll explore the core concepts (building blocks) behind drag and drop functionality in jQuery.
- Draggable element
- Containment
1. Draggable element
Draggable elements are key components of any drag and drop interface. It allows users to grab and move objects across the screen. It can be one or more elements. As per the below example code, you should add the class drag_drop_object to the element. It is the jQuery selector element. We have a complete example below and we are using an image as the draggable element.
$(".drag_drop_object").draggable();2. Containment (droppable boundary)
Containment is the area within which the draggable element is allowed to be dragged around and dropped. It defines the boundary.
$(".drag_drop_object").draggable({
    containment: "parent"
});
Customizing Drag and Drop Behavior
There are more options, methods, and events to control jQuery drag and drop. The drag and drop options can be set as the arguments of draggable().
For example, we are setting the cursor property to the drag event. These two methods can be used while setting drag properties.

Setting a property on initializing draggable.
$("#drag_drop_object").draggable({ cursor: "hand" });
Setting property after initialization.
$("#drag_drop_object").draggable();
$("#drag_drop_object").draggable("option", "cursor", "hand");
Advanced jQuery drag and drop options
- axis – To set the dragging direction (vertical or horizontal).
- delay – time taken (in milliseconds) to start dragging from pressing the mouse.
- helper – To allow to create the copy of the drag element if needed.
- revert – To restore the drag element to its original position (possible Values true, valid).
- revertDuration – The time to revert element position.
- scroll – To contain scrollable drag-area.
And there are much more options in this widget, which makes drag and drop quite interesting.
Controlling drag and drop Behavior
Controlling drag and drop behavior empowers developers to tailor the user experience to specific requirements. This includes configuring options such as containment, snapping, and cursor styling to control how draggable elements interact with droppable targets. Additionally, you can define constraints, handle collisions, and implement visual feedback to enhance usability throughout the drag and drop process.
- enable() – To enable drag.
- disable() – To disable drag.
- destroy() – To clear drag.
- options() – To set drag properties.
Handling drag and drop events
Handling drag and drop events involves capturing various interactions during the drag and drop process. Events like ‘dragstart’, ‘drag’, ‘dragenter’, ‘dragleave’, ‘dragover’, and ‘drop’ allow code to respond dynamically to user actions.
By using these events, you can update UI elements, perform validation, or trigger custom actions based on the drag and drop interactions. Understanding these events is crucial for building responsive and interactive drag and drop interfaces.
- Create – on create.
- Start – on start dragging the element after mouse down.
- Drag – during the drag.
- Stop – releasing the mouse from dragging.
jQuery drag and drop example
<!DOCTYPE html>
<html lang="en">

<head>
    <meta charset="UTF-8">
    <meta name="viewport" content="width=device-width, initial-scale=1.0">
    <title>jQuery drag and drop example</title>
    <style>
        .draggable-containment {
            padding: 0px;
            max-width: 450px;
            height: 300px;
            border: #919191 2px solid;
            border-radius: 15px;
        }

        .drag_drop_object {
            cursor: grab;
        }
    </style>
</head>

<body>
    <h1>jQuery drag and drop example</h1>
    <div class="draggable-containment">
        <img src="drag_drop_object.png" alt="drag droppable object" class="drag_drop_object" />
    </div>
    <script src="https://code.jquery.com/jquery-3.7.1.min.js"
        integrity="sha256-/JqT3SQfawRcv/BIHPThkBvs0OEvtFFmqPF/lYI/Cxo=" crossorigin="anonymous"></script>
    <script src="https://code.jquery.com/ui/1.13.2/jquery-ui.min.js"
        integrity="sha256-lSjKY0/srUM9BE3dPm+c4fBo1dky2v27Gdjm2uoZaL0=" crossorigin="anonymous"></script>

    <script>
        $(function () {
            $(".drag_drop_object").draggable({
                containment: ".draggable-containment"
            });
        });
    </script>
</body>

</html>
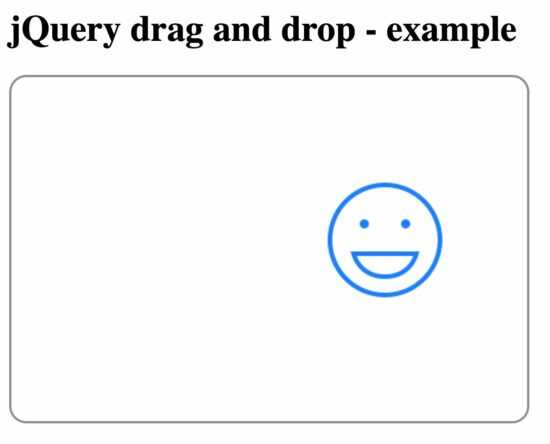
jQuery drag and drop example output
The screenshot below displays the output of the jQuery drag and drop example mentioned above. It captures one instance of a drag operation.

jQuery drag and drop example 2 – detailed
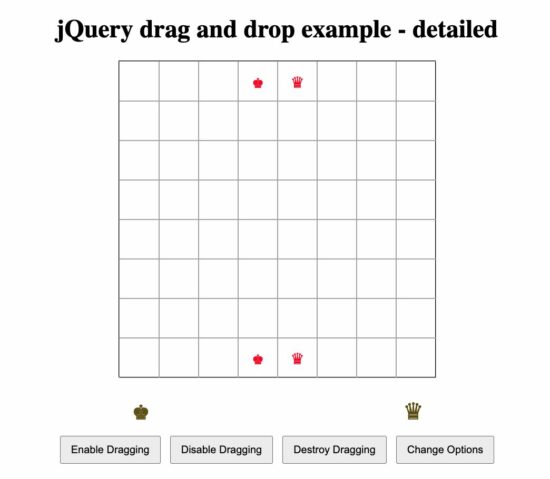
The previous example is simple and will be useful for the simplest use case. But in real world projects, you will have event handling and more detailed controls. So I am presenting you a detailed example that covers almost all aspects of the jQuery UI draggable drag and drop feature.
I have created a placeholder for the drag and drop related events. Those will write a message to the console. Which you can replace with your business logic. This is a simple chess like board with the king and queen only. You can extend this code and add more coins to it.
The two pieces can be dragged and dropped onto the board. Where each square is the bounding element. There are four buttons below the board which gives the user the control of drag and drop options.
<!DOCTYPE html>
<html lang="en">

<head>
    <meta charset="UTF-8">
    <meta name="viewport" content="width=device-width, initial-scale=1.0">
    <title>jQuery drag and drop example - detailed</title>
    <link rel="stylesheet" href="https://code.jquery.com/ui/1.12.1/themes/base/jquery-ui.css">
    <style>
        button {
            padding: 8px 12px;
            margin: 4px;
        }

        .container {
            text-align: center;
        }

        .board {
            display: grid;
            grid-template-columns: repeat(8, 50px);
            grid-template-rows: repeat(8, 50px);
            border: 1px solid black;
            width: fit-content;
            margin: 0 auto;
        }

        .square {
            color: #ff0000;
            width: 50px;
            height: 50px;
            display: flex;
            justify-content: center;
            align-items: center;
            font-size: 24px;
            cursor: pointer;
            border: 1px solid #aeaeae;
        }

        .pieces {
            display: flex;
            justify-content: space-around;
            margin-top: 20px;
        }

        .piece {
            width: 50px;
            height: 50px;
            font-size: 36px;
            cursor: pointer;
            color: #675800;
        }
    </style>
</head>

<body>
    <div class="container">
        <h1>jQuery drag and drop example - detailed</h1>
        <div class="board">
            <!-- Squares will be generated here -->
        </div>
        <div class="pieces">
            <div class="piece" id="black-king">♚</div>
            <div class="piece" id="black-queen">♛</div>
            <!-- Add more pieces for the chess game -->
        </div>
        <button onclick="enableDrag()">Enable Dragging</button>
        <button onclick="disableDrag()">Disable Dragging</button>
        <button onclick="destroyDrag()">Destroy Dragging</button>
        <button onclick="changeOptions()">Change Options</button>
    </div>
    <script src="https://code.jquery.com/jquery-3.6.0.min.js"></script>
    <script src="https://code.jquery.com/ui/1.12.1/jquery-ui.min.js"></script>
    <script>
        let draggableInitialized = false;

        function enableDrag() {
            $(".piece").draggable("enable");
        }

        function disableDrag() {
            $(".piece").draggable("disable");
        }

        function destroyDrag() {
            $(".piece").draggable("destroy");
            draggableInitialized = false;
        }

        function changeOptions() {
            $(".piece").draggable("option", "revert", true);
        }

        $(document).ready(function () {
            // Generate squares for the chessboard
            const board = $(".board");
            for (let row = 1; row <= 8; row++) {
                for (let col = 1; col <= 8; col++) {
                    const square = $("<div>", {
                        class: "square",
                        "data-row": row,
                        "data-col": col
                    });
                    board.append(square);
                }
            }

            $(".square").droppable({
                drop: function (event, ui) {
                    const piece = ui.draggable;
                    const square = $(this);
                    const pieceId = piece.attr("id");
                    const pieceSymbol = piece.text();
                    square.text(pieceSymbol);
                    piece.css({ top: 0, left: 0 });
                }
            });

            // Initialize draggable pieces
            initializeDraggable();
        });

        function initializeDraggable() {
            if (!draggableInitialized) {
                // drag and drop even handling
                $(".piece").draggable({
                    create: function (event, ui) {
                        console.log("Draggable created");
                    },
                    start: function (event, ui) {
                        console.log("Drag started");
                    },
                    drag: function (event, ui) {
                        console.log("Dragging");
                    },
                    stop: function (event, ui) {
                        console.log("Drag stopped");
                    }
                });
                draggableInitialized = true;
            }
        }
    </script>
</body>

</html>

