Login authentication is an important first step in an application. With enhanced authentication mechanisms, apps allow the right users into the system.
There are packages provided by Laravel to enable authentication in an application. It performs session-based authentication to validate the registered users. When sending a network call to the Laravel API, it performs token-based authentication.
This tutorial describes steps to create a Laravel project handling login authentication. It uses a Laravel starter kit providing application scaffolding with authentication features.
We can split this article into 5 sections. It explains how to build a new Laravel app with a login, registration option.
-
- Setup new Laravel project and database.
- Enable Laravel login authentication with Breeze kit.
- Auth routes and route-specific controllers.
- SMTP-like mailers configuration.
- Laravel login authentication example app screenshots.
1. Setup new Laravel project and database
In our first example on the PHP Laravel project, we have seen the basic steps for beginners to set up a new app.
It includes a set of terminal commands to download, install and set up the project app with a database.
This section will show steps to set up the Laravel login authentication application. We have seen similar steps before in the context of creating CRUD in Laravel.
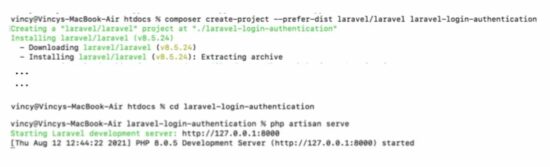
Step 1: Download Laravel app using Composer
This command is for creating the laravel-login-authentication project into the development root. Then, go to the created project folder via cd laravel-login-authentication.
composer create-project --prefer-dist laravel/laravel laravel-login-authentication
Step 2: Run php artisan serve command to create a development server
The following screenshot shows commands to set up a project and a development server.
Step 3: Configure the database
Import this project into your IDE and configure the Laravel environment file. The below code shows a part of the .env file of this example. It has the configured database credentials as follows.
.env (database)
DB_CONNECTION=mysql
DB_HOST=127.0.0.1
DB_PORT=3306
DB_DATABASE=laravel-login
DB_USERNAME=root
DB_PASSWORD=
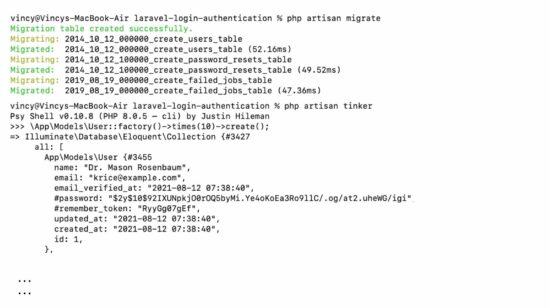
Step 4: Migrate auth tables schema and seed database
After configuring the database credentials, it’s time to execute the migration to import the tables. The database/migrations/ folder contains the PHP classes to create the auth tables.
php artisan migrate
Step 5 (optional): Seed user tables with random data via Laravel Factory
This example seeds the database to insert user records. Run the following commands one by one to feed random data to auth tables.
php artisan tinker
Then,
\App\Models\User::factory()->times(5)->create();
It uses the UserFactory class to generate random user records. As specified in the above command it creates 5 records in the table users in the database.
The UserFactory.php PHP class is come up with the Laravel app itself. It defines functions to return the random row data for the fillable fields of the User model.
database/factories/UserFactory.php
<?php

namespace Database\Factories;

use App\Models\User;
use Illuminate\Database\Eloquent\Factories\Factory;
use Illuminate\Support\Str;

class UserFactory extends Factory
{
    /**
     * The name of the factory's corresponding model.
     *
     * @var string
     */
    protected $model = User::class;

    /**
     * Define the model's default state.
     *
     * @return array
     */
    public function definition()
    {
        return [
            'name' => $this->faker->name(),
            'email' => $this->faker->unique()->safeEmail(),
            'email_verified_at' => now(),
            'password' => '$2y$10$92IXUNpkjO0rOQ5byMi.Ye4oKoEa3Ro9llC/.og/at2.uheWG/igi', // password
            'remember_token' => Str::random(10),
        ];
    }

    /**
     * Indicate that the model's email address should be unverified.
     *
     * @return \Illuminate\Database\Eloquent\Factories\Factory
     */
    public function unverified()
    {
        return $this->state(function (array $attributes) {
            return [
                'email_verified_at' => null,
            ];
        });
    }
}
Note: This seeding the database with the user data is an optional step. It is for testing purposes. It loads bulk data into the user database without going through the registration.
2. Enable Laravel login authentication with Breeze kit
Laravel provides starter kits like Breeze, Jetstream. They give application scaffolding to have a good start of development. It generates models, views, controllers, routes for the preliminary modules.
This example uses Laravel Breeze to enable login authentication for the application. It provides the following authentication features for a Laravel application.
- Login
- Registration
- Password reset
- Email verification
- Password confirmation
It uses Blade templates with Tailwind CSS for the auth screen views. It creates auth routes and enables providers to make the login authentication work.
These steps are to install the Breeze kit to enable Laravel login authentication.
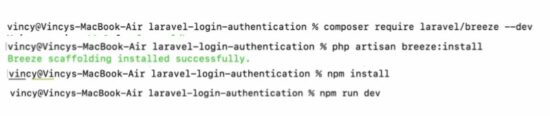
Step 1: Use composer to download Laravel Breeze
This command downloads the Laravel Breeze starter kit for your application.
composer require laravel/breeze --dev
Step 2: Install Laravel Breeze
Execute the following PHP artisan command to install the Breeze tool kit.
php artisan breeze:install
Then, run the following npm commands to get all dependent assets.
npm install
npm run dev
php artisan migrate
Then, the Laravel login authentication option must be enabled in the application. The following auth routes will be created to browse the auth pages.
- Login – /login
- Signup – /register
- Password recovery – /forgot-password
Start the development server. Then hit these routes to experience Laravel login authentication flow.
3. Auth Routes and route-specific controllers
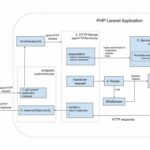
All the auth routes are created at routes/auth.php by installing this starter kit. It defines routes with auth-specific controllers and middleware as below.
It uses the controllers handling the Laravel login authentication functionalities. It posts requests to the corresponding controllers to perform the functionalities like,
- Login session validation
- User registration
- Email verification
- Password reset
- Password confirmation
routes/auth.php
<?php

use App\Http\Controllers\Auth\AuthenticatedSessionController;
use App\Http\Controllers\Auth\ConfirmablePasswordController;
use App\Http\Controllers\Auth\EmailVerificationNotificationController;
use App\Http\Controllers\Auth\EmailVerificationPromptController;
use App\Http\Controllers\Auth\NewPasswordController;
use App\Http\Controllers\Auth\PasswordResetLinkController;
use App\Http\Controllers\Auth\RegisteredUserController;
use App\Http\Controllers\Auth\VerifyEmailController;
use Illuminate\Support\Facades\Route;

Route::get('/register', [RegisteredUserController::class, 'create'])
                ->middleware('guest')
                ->name('register');

Route::post('/register', [RegisteredUserController::class, 'store'])
                ->middleware('guest');

Route::get('/login', [AuthenticatedSessionController::class, 'create'])
                ->middleware('guest')
                ->name('login');

Route::post('/login', [AuthenticatedSessionController::class, 'store'])
                ->middleware('guest');

Route::get('/forgot-password', [PasswordResetLinkController::class, 'create'])
                ->middleware('guest')
                ->name('password.request');

Route::post('/forgot-password', [PasswordResetLinkController::class, 'store'])
                ->middleware('guest')
                ->name('password.email');

Route::get('/reset-password/{token}', [NewPasswordController::class, 'create'])
                ->middleware('guest')
                ->name('password.reset');

Route::post('/reset-password', [NewPasswordController::class, 'store'])
                ->middleware('guest')
                ->name('password.update');

Route::get('/verify-email', [EmailVerificationPromptController::class, '__invoke'])
                ->middleware('auth')
                ->name('verification.notice');

Route::get('/verify-email/{id}/{hash}', [VerifyEmailController::class, '__invoke'])
                ->middleware(['auth', 'signed', 'throttle:6,1'])
                ->name('verification.verify');

Route::post('/email/verification-notification', [EmailVerificationNotificationController::class, 'store'])
                ->middleware(['auth', 'throttle:6,1'])
                ->name('verification.send');

Route::get('/confirm-password', [ConfirmablePasswordController::class, 'show'])
                ->middleware('auth')
                ->name('password.confirm');

Route::post('/confirm-password', [ConfirmablePasswordController::class, 'store'])
                ->middleware('auth');

Route::post('/logout', [AuthenticatedSessionController::class, 'destroy'])
                ->middleware('auth')
                ->name('logout');
4. SMTP-like mailers configuration
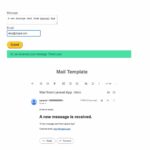
Since the Laravel login authentication via Breeze includes functionalities sending emails. For example, Email verification and password recovery functionalities send emails to the end-users.
So, we have to configure the mailer options in the .env file. Also, verify the config/mail.php file to ensure that the mailer options use the data configured in the .env file. Otherwise, edit the mail.php configuration. Below code configured SMTP as the default mailer to send emails.
.env (SMTP)
MAIL_MAILER=smtp
MAIL_HOST=mailhog
MAIL_PORT=1025
MAIL_USERNAME=null
MAIL_PASSWORD=null
MAIL_ENCRYPTION=null
MAIL_FROM_ADDRESS=null
MAIL_FROM_NAME="${APP_NAME}"
config/mail.php
<?php
return [

    'default' => env('MAIL_MAILER', 'smtp'),

    'mailers' => [
        'smtp' => [
            'transport' => 'smtp',
            'host' => env('MAIL_HOST', 'smtp.mailgun.org'),
            'port' => env('MAIL_PORT', 587),
            'encryption' => env('MAIL_ENCRYPTION', 'tls'),
            'username' => env('MAIL_USERNAME'),
            'password' => env('MAIL_PASSWORD'),
            'timeout' => null,
            'auth_mode' => null,
        ],
    ],

    'from' => [
        'address' => env('MAIL_FROM_ADDRESS', 'hello@example.com'),
        'name' => env('MAIL_FROM_NAME', 'Example'),
    ],

];
After this configuration, clear the cache to make the recent configurations effective.
php artisan config:cache
php artisan config:clear
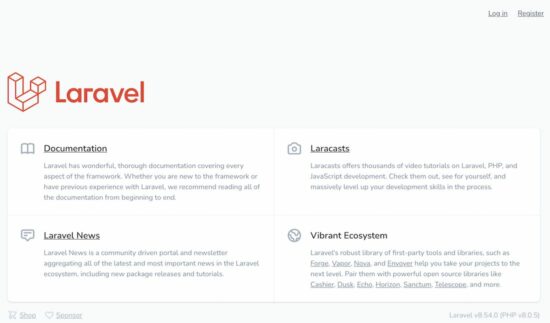
5. Laravel login authentication example app screenshots
After all the definitions and configurations, we can start browsing the auth pages. By installing the Breeze, the layout will show the login, register links in the header. See the welcome page screenshot to see this.
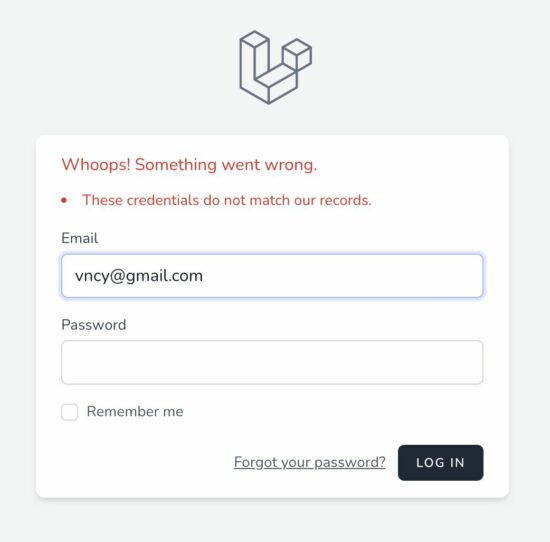
Login page template
The starter kit generates the login.blade.php template file in views/auth directory. It displays an elegant login form with the TailwindCSS library.
The screenshot shows the login form with an alert message to notify users who attempt the login.
User registration form
It provides a basic registration with minimal fields. The below form receives data to register with the laravel-login-authentication application. It uses browsers’ default validation to apply the not-empty and email-format checkings.
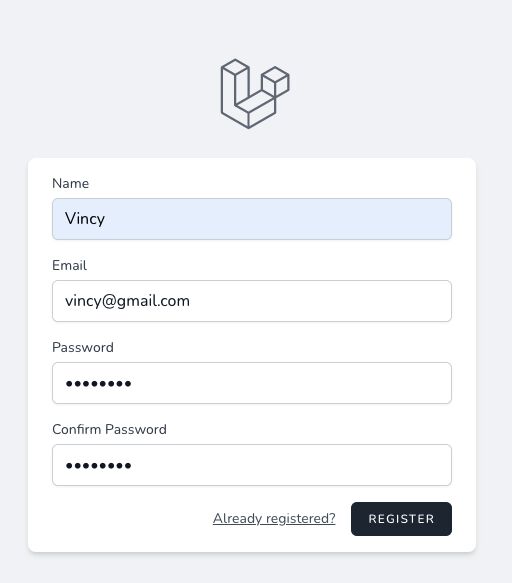
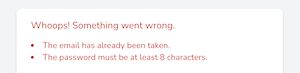
It performs validation to verify the user email uniqueness among the existing users. It also forces to keep the password with the length of 8. See the screenshot below which displays the server-side validation response on submit.
This functionality comes up with the Laravel starter kit. It is skippable if you want to make a quick test only on the login flow. We may seed the database and use the data to check the login functionality.
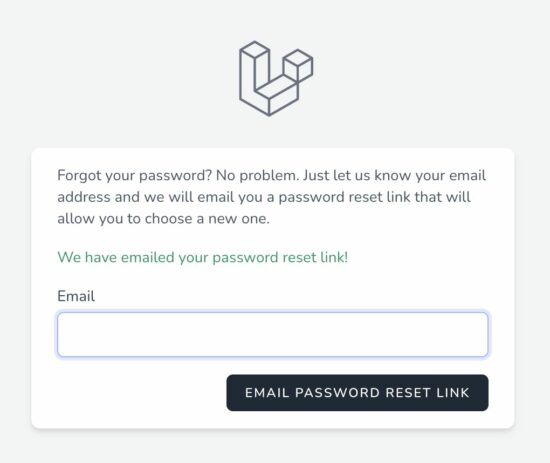
Password Recovery
The below screenshot displays the forgot password option provided by the authentication scaffolding. It receives the user’s email to let them recover the forgotten password.
Alternative Laravel packages profiles scaffold application with the authentication system
There are many Laravel packages provided for enabling the application authentication system. We have seen one among them that is, the Laravel Breeze.
The others are listed as follows.
- Laravel JetStream
- Laravel Fortify
The token-based authentication packages for the Laravel APIs are
- Passport
- Sanctum
It supports features like 2FA, team management, profile management and more. The token-based authentication packages provide authentication for the SPA, mobile apps and more.
Conclusion
Thus, we have created the Laravel login authentication example using the Breeze kit. Undoubtedly the Laravel starter kits help to have an easy start for beginners.
We can also create the login authentication system on our own instead of using the starter kits. It saves time and creates a minimal foundation while building a Laravel app from the scratch.
We have seen step by steps process to execute the commands to enable authentication. Also, we saw the elegant forms’ screenshots during the Laravel login authentication flow.