Meme Generator using jQuery
by Vincy. Last modified on July 5th, 2023.
This article will show the code for generating Meme images using jQuery. In this example, I have provided options to upload a meme image and add text to the image.
I have used the jQuery UI library to change the position of the meme text over the background image using the drag-and-drop action.
I have given a file input option and a button to create an editable HTML div to add meme text. The image uploaded using the file input option will be used as the meme background.
The editable elements are iterated and added on top of the meme background. After adding the background and the text messages, the meme preview will be shown for download. I used HTML canvas context to generate the meme preview by using the uploaded image and the text messages.
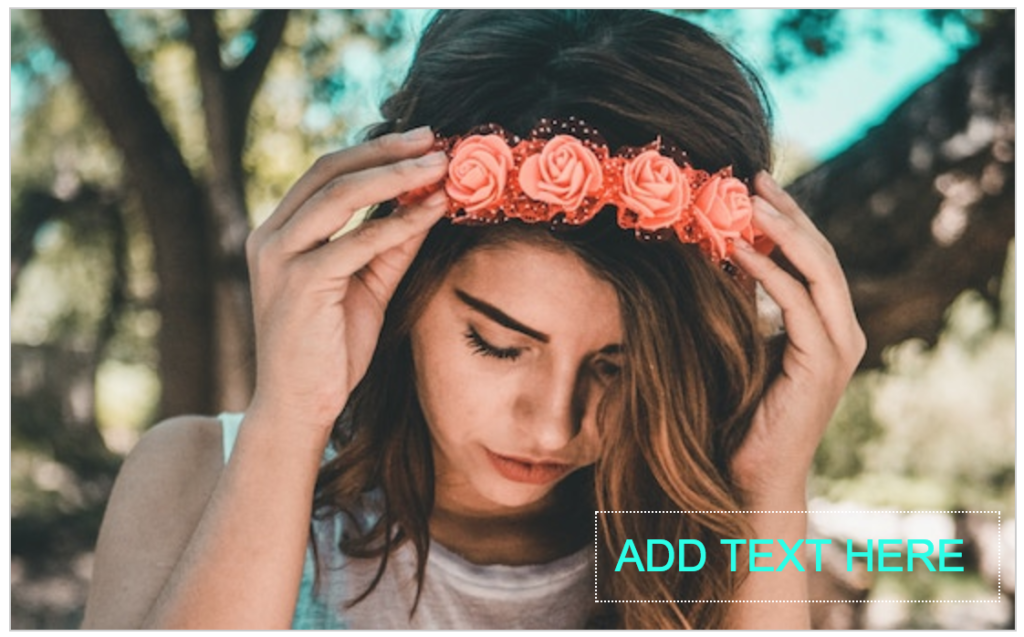
The following screenshot is showing the output for the jQuery meme generator example code.
Meme Generator HTML
The following code shows options to upload the image file and to add meme text. It has a canvas element on which the meme preview is generated using jQuery. After generating a meme image, this code allows downloading the meme image file.
<div>
    <input type="file" name="meme_bg" value="Upload MEME Image" class="choose-file" onChange="showPreview(this);" />
    <input type="button" name="add_text" value="Add Text" class="btn-add" onClick="createTextArea()" />
</div>

<div id="meme-bg-target">
    <img src="default.jpg" id="img-meme-bg" class="img-meme-bg" />
</div>
<div>
    <input type="button" name="save-as-image" id="save-as-image" class="btn-save" value="Save" />
</div>

<div class="label-preview">Preview</div>
<div id="meme-canvas-container">
    <canvas id="meme-preview"></canvas>
</div>
<div class="download-container">
    <a name="download-image" id="download-image" class="btn-download" download="meme-image.png">Download</a>
</div>
In the following code, the showPreview() is used to show a meme preview on choosing an image file, and the createTextArea() is used to create editable elements dynamically.
function showPreview(objFileInput)
{
    if (objFileInput.files[0])
    {
        var fileReader = new FileReader();
        fileReader.onload = function (e) {
            $("#meme-bg-target img").attr('src', e.target.result);
        }
        fileReader.readAsDataURL(objFileInput.files[0]);
    }
}
function createTextArea()
{
	var txtAreaHTML = "<div contentEditable='true' class='meme-txt-area'></div>";
	$("#meme-bg-target").append(txtAreaHTML);
	$(".meme-txt-area").draggable();
	$(".meme-txt-area").focus();
}
jQuery Function to Copy HTML to the Meme Context
This jQuery code shows the function copyToCanvas() triggered on saving the meme content. In this function, I created the meme context using the canvas element.
I plotted the uploaded image by setting its source to the meme image context. Then, I iterated the text elements and positioned the text over the meme background.
function copyToCanvas(htmlElement)
{
	var canvas = document.getElementById("meme-preview");
    var ctx = canvas.getContext("2d");

 	image = new Image(0, 0);
    	image.onload = function () {
    		canvas.width = this.naturalWidth;
    	    canvas.height = this.naturalHeight;

    	      ctx.drawImage(this, 0, 0);
          ctx.font = "24px Arial";
    	      ctx.fillStyle = "#00ffe7";
              var top = 0;
              var left = 0;
              var cellspace = 0;
    	      $(".meme-txt-area").each(function(){
              cellspace = parseInt($(this).css("padding"));
              left = parseInt($(this).css("left")) + cellspace;
              top = parseInt($(this).css("top")) + 3 * cellspace;
              ctx.fillText($(this).text(), left, top);
    	      });
    	};

   image.src = $("#img-meme-bg").attr("src");
}

$(document).ready(function (e) {
	$("#save-as-image").on('click', function () {
     	copyToCanvas($('#meme-bg-target'));
    });

	$("#download-image").on('click', function () {
		var canvas = document.getElementById("meme-preview");
	    var imageURL = canvas.toDataURL();
	    $("#download-image").attr("href", imageURL);
	});

});

Written by Vincy, a web developer with 15+ years of experience and a Masters degree in Computer Science. She specializes in building modern, lightweight websites using PHP, JavaScript, React, and related technologies. Phppot helps you in mastering web development through over a decade of publishing quality tutorials.
Hi, I'm Vincy. I help build websites, grow businesses, big and small. If that is what you want, contact me.
I'm currently available for freelance work.