This tutorial will display a progress bar during the AJAX file upload process using jQuery. We are using jQuery form library and functions$(form).ajaxSubmit() update to submit form data to the PHP page.
After progressing image upload, we show the preview to the target selector.
File Upload Form showing Progress Bar
In this form, we have a file input field and a progress bar to show the file upload progress.
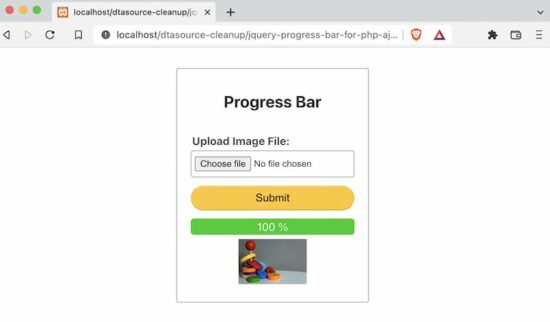
Initially, the progress bar width is set to 0, which will gradually increase based on the progress completed.
<html>
<head>
<TITLE>jQuery Progress bar for PHP AJAX File Upload</TITLE>
<link rel="stylesheet" type="text/css" href="css/style.css" />
<link rel="stylesheet" type="text/css" href="css/form.css" />
<style>
#uploadForm label {
    margin: 2px;
    font-size: 1em;
}

#progress-bar {
    background-color: #12CC1A;
    color: #FFFFFF;
    width: 0%;
    -webkit-transition: width .3s;
    -moz-transition: width .3s;
    transition: width .3s;
    border-radius: 5px;
}

#targetLayer {
    width: 100%;
    text-align: center;
}
</style>
<script src="https://code.jquery.com/jquery-2.1.1.min.js"
    type="text/javascript"></script>
<script
    src="https://cdnjs.cloudflare.com/ajax/libs/jquery.form/4.3.0/jquery.form.min.js"
    integrity="sha512-YUkaLm+KJ5lQXDBdqBqk7EVhJAdxRnVdT2vtCzwPHSweCzyMgYV/tgGF4/dCyqtCC2eCphz0lRQgatGVdfR0ww=="
    crossorigin="anonymous" referrerpolicy="no-referrer"></script>
</head>
<body>
    <div class="phppot-container tile-container">
        <form id="uploadForm" action="upload.php" method="post">

            <h2 class="text-center">Progress Bar</h2>
            <div>
                <div class="row">
                    <label>Upload Image File:</label> <input
                        name="userImage" id="userImage" type="file"
                        accept="image/*" class="full-width" required>
                </div>
                <div class="row">
                    <input type="submit" value="Submit"
                        class="full-width" />
                </div>
                <div class="row">
                    <div id="progress-bar"></div>
                </div>
                <div id="targetLayer"></div>
            </div>
        </form>
        <div id="loader-icon" style="display: none;">
            <img src="LoaderIcon.gif" />
        </div>
    </div>
</body>
</html>
jQuery Form Submit
$(form).ajaxSubmit() contains set of options to track the progress of the AJAX call. jQuery uploadProgress updates the progress bar status with the currently completed uploading progress. The script is,
$(document).ready(function() {
	$('#uploadForm').submit(function(e) {
		if ($('#userImage').val()) {
			e.preventDefault();
			$('#loader-icon').show();
			$(this).ajaxSubmit({
				target: '#targetLayer',
				beforeSubmit: function() {
					$("#progress-bar").width('0%');
				},
				uploadProgress: function(event, position, total, percentComplete) {
					$("#progress-bar").width(percentComplete + '%');
$("#progress-bar").html('‘) }, success: function() { $(‘#loader-icon’).hide(); }, resetForm: true }); return false; } }); });
PHP file upload code is the same as we have seen for single and multiple image uploads using jQuery.
This code returns the image HTML with the uploaded image source. It will show the preview on the browser using the callback script.
<?php
if (! empty($_FILES)) {
    if (is_uploaded_file($_FILES['userImage']['tmp_name'])) {
        $sourcePath = $_FILES['userImage']['tmp_name'];
        $targetPath = "images/" . $_FILES['userImage']['name'];
        if (move_uploaded_file($sourcePath, $targetPath)) {
            ?>
<img src="<?php echo $targetPath; ?>" width="100px" height="100px" />
<?php
        }
    }
}
?>